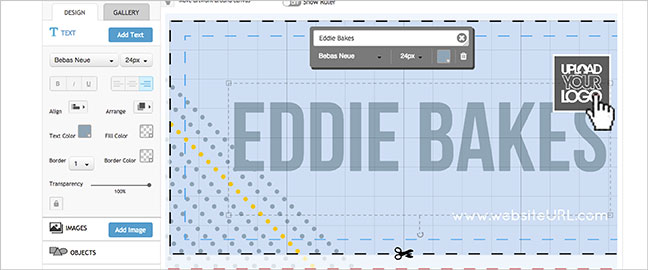
To Design a Bumper Sticker in Illustrator, begin by setting up your document to the desired size. Choose vibrant colors and legible fonts to ensure readability from a distance.
Designing a Bumper Sticker in Illustrator stands out and requires an understanding of both creative and technical aspects. Adobe Illustrator provides the perfect platform to bring your unique ideas to life. With its vector-based tools, designers can craft sharp and scalable graphics suitable for printing on stickers that will adorn vehicles and catch the eye of passersby.
Tailored to graphic professionals and enthusiasts alike, this guide presents an accessible approach to sticker creation. The focus remains on crafting a message that resonates, combined with striking visuals that pop from the bumper. By balancing aesthetics with the practical considerations of sticker design, such as weather resistance and adhesion, a memorable and durable bumper sticker can be produced.
Starting Your Bumper Sticker Project
Embarking on the creative path of Designing a Bumper Sticker in Illustrator requires a good setup in Adobe Illustrator. This staple graphic design software offers all the tools needed. The journey begins with understanding the proper dimensions and organizing the workspace. A well-prepared start paves the way for a smooth design process.
Choosing The Right Document Size
The first step is to select the appropriate document size for your bumper sticker. Bumper stickers typically measure around 10 inches wide by 3 inches tall. However, sizes can vary. So first of all, Open Illustrator and click ‘Create New’. Select ‘Print’ from the top tab for high resolution. Enter your desired width and height. Set the color mode to CMYK for print accuracy. Choose a 300 DPI resolution for clear images.
Setting Up The Workspace
Now, let’s optimize the workspace for Design a Bumper Sticker in Illustrator. A tidy workspace allows for efficient workflow.
- Select ‘Essentials’ from the Workspace drop-down.
- Click ‘Window’ on the top menu.
- Check options like ‘Layers’, ‘Swatches’, and ‘Pathfinder’.
- Drag and place the panels for easy access.
- Save the workspace for future projects.
With these steps, Illustrator is primed for your creativity. Let’s make that bumper sticker shine!

Credit: www.psprint.com
Laying The Foundation
Embarking on the exciting journey of designing a bumper sticker in Adobe Illustrator starts with laying a solid foundation. This initial phase is crucially important as it dictates the visual impact and overall effectiveness of your sticker design. Let’s dive into establishing the perfect base for your project.
Selecting A Background Color
Choosing the right background color Design a Bumper Sticker in Illustrator sets the tone for your bumper sticker. It’s not just about aesthetics; the color must resonate with your message and audience.
- Open a new document in Illustrator and set your dimensions.
- Click on the ‘Rectangle Tool’ or press ‘M’ to create your sticker’s shape.
- Choose a color from the ‘Fill’ option in the toolbar. Think about visibility and contrast.
- Test different colors against potential text and images to ensure readability.
Bear in mind that each color can evoke different emotions and reactions, so pick one that aligns with your bumper sticker’s purpose.
Aligning Elements For Balance
With the background color in place, the next step is strategically aligning elements to create balance. A well-balanced design captures attention and enhances legibility.
- Use the ‘Align’ panel to adjust your design elements with precision.
- Ensure text, icons, or any graphics are evenly spaced.
- Utilize the ‘Rulers’ (Command/Control + R) to drag guides onto your canvas.
Remember, balance does not always mean symmetry. Play with layout until the design feels harmonious.
By laying the groundwork thoughtfully, you’re setting yourself up for success in creating a bumper sticker that stands out. Keep it simple, significant, and striking! Creative Elements in Design play a crucial role in making bumper stickers stand out. The blend of vivid images, compelling icons, and smartly laid out text turn a simple idea into a catchy visual message. Let’s dive intohow to harness these elements in the Design a Bumper Sticker in Illustrator that pops.
Incorporating Images And Icons
Eye-catching stickers often feature striking images or symbols. Illustrator offers a vast library of clipart, icons, and stock images to bring your concept to life. Follow these steps:
- Select File → Place to import an image into your workspace.
- Use the Trace tool to convert images into vector shapes.
- Access Window → Symbols to drag and drop pre-designed icons.
- Adjust colors using the Swatches panel for uniformity.
Remember to keep balance. Use images that complement your message without overwhelming the text.
Using Type Tools For Text Layout
Impactful stickers need clear, readable text. Illustrator provides powerful type tools to create dynamic text layouts:
- Select the Type Tool (T) from the toolbar.
- Choose a font that reflects the sticker’s mood in the Character panel.
- For emphasis, adjust font weight and size.
- Use Type on a Path to curve text around images and shapes.
- With Paragraph panel, align text for a structured look.
Bold statements or questions in larger fonts capture attention. Keep spacing consistent for a clean finish.
Creative Elements In Design

Credit: creativecloud.adobe.com
Adding Personality With Fonts And Colors
When designing a bumper sticker in Illustrator, adding personality is key. Fonts and colors tell a story even before a single word is read. Captivating choices in these elements can make a design pop. They can convey emotions, messages, and brand identity with just a quick glance. Let’s dive into how to select the perfect fonts and colors that reflect your unique voice.
Choosing Fonts That Speak Volumes
The font chosen to Design a Bumper Sticker in Illustrator can really make the message stand out. It is important to pick a font that is easy to read from a distance. Bold, sans-serif fonts often work best for this. Still, the font should also reflect the personality of the message. For example, a whimsical font could be great for a fun, lighthearted quote. In contrast, something more straight-edged and sharp might suit a serious statement.
Popular Font Choices Include:
- Arial Bold – for clear, straightforward messaging
- Impact – for a strong, attention-grabbing impact
- Comic Sans – for a playful, informal approach
- Times New Roman – for a touch of traditional elegance
Color Theory For Impact
The use of color on a bumper sticker can affect how it is perceived. Color theory is a science that can help you choose colors that work together harmonously. Primary colors like red, blue, and yellow are vivid and eye-catching. On the other hand, pastel shades can convey softness and calm. Choosing contrasting colors can make your design stand out. Yet, colors that are too bright might be hard to look at.
| Emotion | Color | Usage |
|---|---|---|
| Excitement | Red | Grabs attention, use sparingly |
| Trust | Blue | Conveys reliability |
| Optimism | Yellow | Bright and inviting |
| Growth | Green | Represents new beginnings |
Use the color wheel to find complementary colors for harmony. For a bold statement, analogous colors, which sit next to each other on the wheel, are a sure bet. Think about the message and choose colors that bring it to life.
Besides, you should Remember that:
- Contrast is essential for readability.
- Mood can be set with color choice.
- Use saturated colors for vibrancy, duller hues for subtlety.
Finishing Touches
As your bumper sticker design in Illustrator comes together, it’s time to add the finishing touches that make Design a Bumper Sticker in Illustrator stands out. After pouring creativity into your design, these final steps will ensure that your sticker looks professional and grabs attention for all the right reasons. Let’s polish your artwork to perfection.
Layer Styles And Effects
Injecting life into your bumper sticker involves experimenting with Illustrator’s layer styles and effects. These tools can add depth and dimension to your design. Here’s how to enhance your sticker:
- Drop shadows for a 3D effect
- Use glows for highlights
- Bevel and emboss to raise design elements
- Apply gradients for depth
Double-checking Alignment And Readability
Accuracy is key in sticker design. To ensure your message is seen and understood:
Align text and graphics precisely. Enter key elements for balance. Confirm font size is readable from a distance. Check for proper contrast between text and background. Use Illustrator’s alignment tools to tidy your design. Keep text legible and graphics sharp. This attention to detail ensures your bumper sticker makes the impact you want. Now, your design is not just creative but professional too!
Preparing For Print
Preparing for print is a vital step in designing a bumper sticker. A great design can lose impact without proper setup for printing. It’s essential to understand bleed and margin settings in Illustrator to ensure your stickers look professional once printed. Equally important is choosing the right export settings to maintain high quality.
Setting Proper Bleeds And Margins
Bleeds and margins serve as buffers during the printing process. Bleeds extend the design slightly beyond the final sticker size, while margins keep critical elements from being cut off. Here’s how to set them:
- Open your Illustrator document and navigate to ‘File’ then ‘Document Setup’.
- Click on ‘More Options’ to reveal the bleed settings.
- Enter 0.125 inches for top, bottom, left, and right bleeds. This addition ensures no unprinted edges occur if the sticker is trimmed slightly off.
- Review your artwork to ensure all text and main design elements are within the safety area, at least 0.1 inches inside the final sticker’s edge.
Export Options For High-quality Output
Once you finish your Design a Bumper Sticker in Illustrator, exporting it correctly is crucial for sharp, clear stickers. Follow these steps to export your file:
- Select ‘File’ then ‘Export’ and choose ‘Export As…’
- Pick Adobe PDF (pdf) as your format. Ensure ‘Use Artboards’ is checked.
- In the Adobe PDF dialogue box, select ‘Press Quality’ preset to maintain high resolution.
- Under ‘Marks and Bleeds’, select ‘Trim Marks’ and check ‘Use Document Bleed Settings’.
Remember to preview your PDF to confirm everything looks as expected before sending it to print.

Credit: www.uprinting.com
Frequently Asked Questions Of How To Design A Bumper Sticker In Illustrator
How Do You Make A Sticker In Illustrator?
Start by opening Adobe Illustrator and creating a new document. Select the shape tool to draw your desired sticker shape. Add colors, text, and graphics as needed. Finally, add a border or cut line if required to Design a Bumper Sticker in Illustrator, and save your sticker design for printing.
What Adobe Program Is Best For Stickers?
Adobe Illustrator is the best choice for designing high-quality stickers, offering precise vector tools and scalable outputs for printing.
What Is The Best Software For Designing Stickers?
Adobe Illustrator is widely regarded as the best software for designing high-quality, professional stickers.
What Size Are Stickers In Illustrator?
In Adobe Illustrator, stickers can be any size, often created within standard dimensions like 2×2, 3×3, or 4×4 inches for common use. Customize to desired specifications by setting your document size.
Conclusion
Using Illustrator to create a personalized bumper sticker may be a wonderful project. Your vision can be achieved on vinyl records by following to the specified methods. Don’t forget to use strong design, which is readable typography, and vivid colors to make your Design a Bumper Sticker in Illustrator statement unique.

