

Looking for a fun and simple way to spark your creativity? DIY popsicle stick projects are perfect for you!
With just a few sticks and some basic supplies, you can make amazing crafts that brighten your space or become thoughtful gifts. Whether you want to relax, challenge your skills, or enjoy quality time with family, these projects are easy to follow and endlessly satisfying.
Keep reading, and you’ll discover ideas that will inspire you to create something unique today!
Credit: www.howweelearn.com
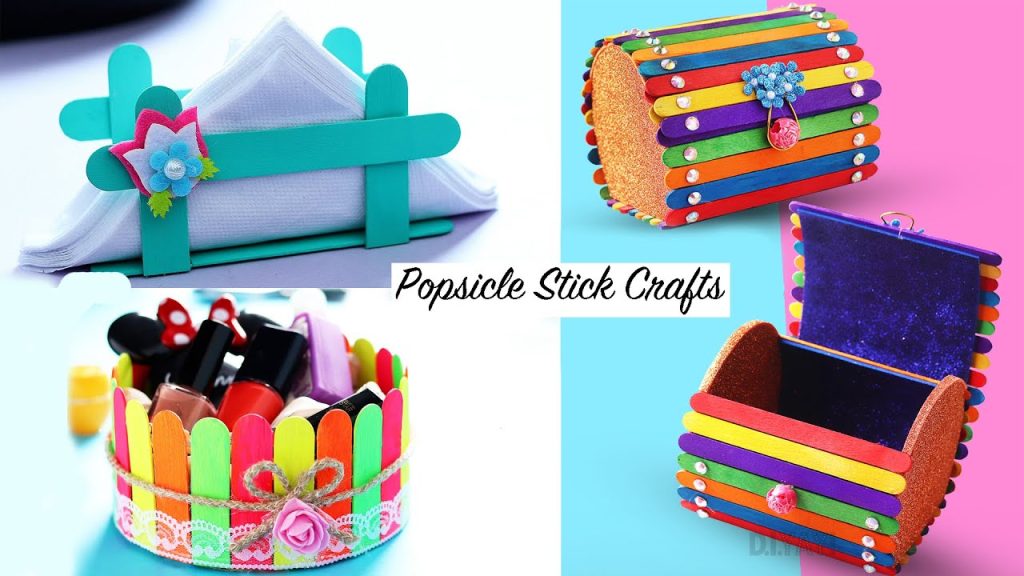
Simple Popsicle Stick Crafts
Popsicle sticks are perfect for easy craft projects. These simple crafts require few materials and little time. Great for kids and beginners, they offer fun and creativity. You can make useful and pretty items with just glue and paint.
Simple popsicle stick crafts bring joy and a sense of achievement. They help improve fine motor skills and focus. Plus, they make lovely handmade gifts or home decorations.
Bookmarks And Book Holders
Bookmarks made from popsicle sticks are quick to create. Paint or decorate them with markers and stickers. Add a ribbon or tassel for a personal touch. Book holders made from sticks keep your books neat. They are sturdy and easy to build. Customize with colors to match your room or style.
Picture Frames
Popsicle stick frames hold your favorite photos beautifully. Arrange the sticks in a square or rectangle shape. Glue them tightly for a strong frame. Paint or decorate with glitter, buttons, or shells. These frames add a handmade charm to any room. They also make thoughtful gifts for friends and family.
Coasters And Trivets
Create coasters by gluing sticks side by side. Add a layer of clear varnish to protect them from water. Trivets, made by arranging sticks in patterns, protect your table from hot dishes. Both crafts are practical and easy to personalize. Use different colors or patterns to fit your kitchen decor.

Credit: www.ssww.com
Home Decor Projects
Home decor projects using popsicle sticks offer a fun and creative way to refresh your living space. These projects are simple, affordable, and perfect for DIY lovers. You can craft beautiful items that add charm and personality to any room. Popsicle sticks are easy to find and work with, making them ideal for beginners and kids too.
Explore various ideas that transform plain sticks into stylish decor pieces. Each project helps you personalize your home while enjoying a relaxing craft activity. Start with basic tools like glue, paint, and some imagination.
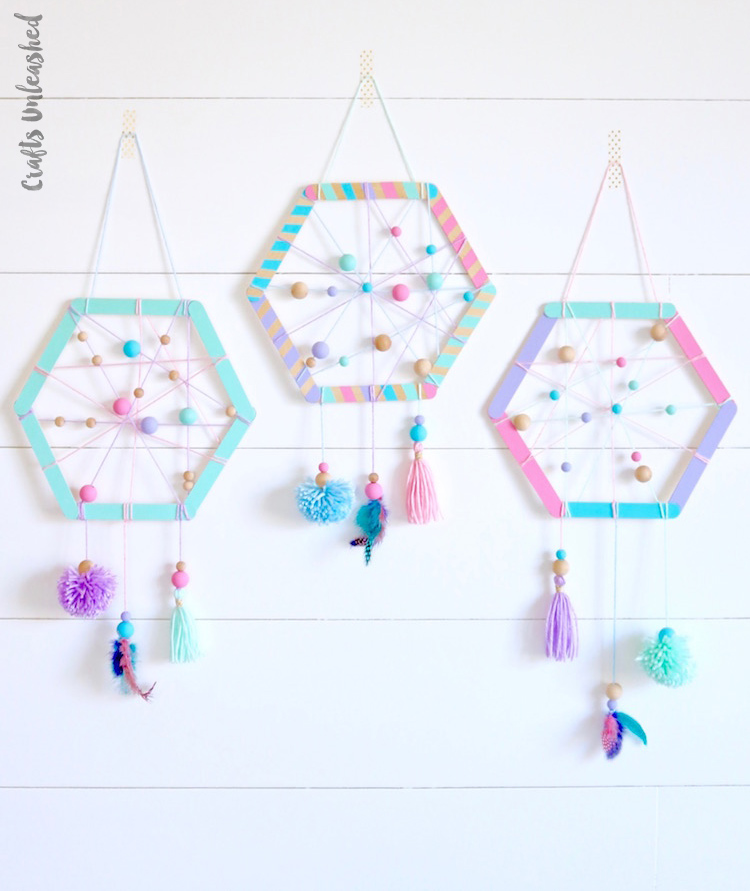
Wall Art And Hangings
Create unique wall art by arranging popsicle sticks in patterns or shapes. Paint them in bright colors or natural wood tones for different looks. You can make geometric designs, abstract shapes, or even inspirational quotes. Add string or hooks to hang your artwork easily. These pieces brighten empty walls and bring a handmade touch to your home.
Mini Shelves And Organizers
Build small shelves or organizers using popsicle sticks for lightweight storage. Perfect for keys, small plants, or craft supplies. Design simple boxes or tiered shelves that fit any space. Customize with paint or stain to match your decor. These organizers keep things tidy and add a rustic charm to rooms or desks.
Plant Holders And Pots
Turn popsicle sticks into charming plant holders and pots. Create small containers or decorative wraps for pots to enhance your plants’ look. Use sticks to build frames that hold air plants or succulents. Paint or varnish your holders to protect them and add style. These projects bring greenery and a cozy feel to any room.
Toys And Games
Toys and games made from popsicle sticks offer fun and learning. These projects keep kids busy and creative. They help develop skills like problem-solving and hand-eye coordination. Popsicle sticks are cheap and easy to find. They make great materials for building small toys at home.
Try different designs and shapes. You can make items that look like real toys or puzzles. These projects are perfect for rainy days or craft sessions. They bring joy without needing expensive tools or parts.
Miniature Furniture
Miniature furniture made from popsicle sticks is simple and fun. Build tiny chairs, tables, or beds for dollhouses. Use glue to join the sticks and create strong pieces. Paint or decorate the furniture to add color. These mini items look cute and realistic. Kids enjoy playing with their handmade furniture sets.
Puzzle And Brain Teasers
Puzzles made from popsicle sticks challenge the mind. Create simple jigsaw puzzles by drawing a picture on sticks. Cut or break the sticks for puzzle pieces. Brain teasers like stick mazes or matching games also work well. These activities boost thinking and focus. They make learning playful and interactive.
Toy Vehicles
Building toy vehicles with popsicle sticks is exciting. Craft cars, trucks, or airplanes using sticks and small wheels. Use rubber bands or paper clips for moving parts. Kids love pushing and rolling their handmade vehicles. This project encourages imagination and fine motor skills. Toy vehicles also offer hours of active playtime.
Holiday And Seasonal Crafts
Holiday and seasonal crafts bring joy and color to any home. Popsicle sticks make these projects easy and fun. They are simple to shape, paint, and decorate. These crafts create beautiful decorations that fit each holiday’s spirit. They also make thoughtful, handmade gifts for friends and family.
Using popsicle sticks lets you craft unique items for different seasons. Each holiday has its special colors and symbols. Popsicle sticks adapt well to all these themes. Kids and adults enjoy making these projects together. This activity sparks creativity and adds a personal touch to your celebrations.
Christmas Ornaments
Create charming Christmas ornaments with popsicle sticks. Glue sticks into stars, trees, or snowflake shapes. Paint them in red, green, white, or gold. Add glitter, beads, or small bells for sparkle. Attach a string loop for easy hanging on the tree. These ornaments bring a cozy, handmade feel to holiday decor.
Halloween Decorations
Make spooky Halloween decorations using popsicle sticks. Build small skeletons, bats, or haunted houses. Paint them in black, orange, and purple for a festive look. Use cotton or yarn to add ghostly textures. Place these crafts around your home or porch. They create a fun, eerie vibe perfect for Halloween night.
Easter And Spring Projects
Popsicle sticks work well for Easter and spring crafts. Form colorful flowers, butterflies, or Easter eggs. Bright pastel paints bring these projects to life. Glue on buttons or sequins for extra detail. These decorations celebrate new growth and fresh beginnings. They brighten your space with cheerful, handmade art.
Educational Activities
Educational activities with popsicle sticks turn simple crafts into learning tools. Kids enjoy hands-on projects that help build skills. These projects support math, science, and language learning in fun ways.
Using popsicle sticks for education makes lessons active and visual. Children can touch, move, and arrange sticks to understand ideas better. This method helps improve memory and focus.
Math And Counting Tools
Popsicle sticks can teach counting and basic math. Children can group sticks to learn addition and subtraction. They also form shapes to explore geometry concepts. Counting with sticks makes abstract numbers concrete and clear.
Creating number lines or simple abacuses with sticks helps visualize math problems. Kids arrange sticks in rows or bundles to compare amounts. This hands-on approach builds confidence in early math skills.
Science Models
Science concepts become easier with popsicle stick models. Kids build bridges to study engineering and forces. They create plant or animal cell models to learn biology. Sticks act as frames for many science ideas.
Constructing simple machines like levers and pulleys shows how physics works. Children learn by doing, which strengthens their understanding. These projects make science real and exciting.
Language Learning Aids
Popsicle sticks help with reading and writing skills. Write letters or words on sticks to create word games. Kids arrange sticks to form sentences or match rhymes. This tactile activity supports language learning.
Teachers and parents use sticks for storytelling and vocabulary building. Children pick sticks to create stories or practice spelling. This playful method encourages speaking and listening skills.
Advanced Techniques
Advanced techniques add depth to your DIY popsicle stick projects. They help create strong, lasting, and beautiful crafts. These methods improve both the look and the structure of your work. Small changes in painting, gluing, and mixing materials make a big difference.
Painting And Staining Tips
Choose paints or stains that suit wood surfaces. Water-based paints dry faster and are easy to clean. Apply thin coats to avoid drips and uneven color. Use a fine brush for detailed areas. Let each layer dry before adding the next. Sand lightly between layers for smoothness. Staining highlights the wood grain and gives a natural look. Test stains on a scrap stick first.
Joining And Gluing Methods
Use wood glue for strong bonds between sticks. Spread glue evenly to avoid weak spots. Clamp sticks together or place heavy objects on top while drying. Hot glue works fast but may not hold well under stress. For complex shapes, try using small nails or pins. Reinforce joints with extra sticks glued across seams. Allow full drying time before handling your project.
Combining Materials
Mixing materials adds texture and interest. Try adding fabric, paper, or metal pieces to your popsicle sticks. Use glue suitable for each material type. Combine wood with paint or markers for colorful designs. Small decorations like beads or buttons can enhance the look. Keep the project balanced so it stays sturdy. Experiment with different combos to find what works best.
Safety And Supplies
Working on DIY popsicle stick projects can be fun and creative. Safety and having the right supplies matter a lot. Knowing what tools to use and how to stay safe helps make the crafting process smooth and enjoyable. Gathering good materials also makes your project look great and last longer.
Essential Tools
Basic tools include glue, scissors, and a ruler. Use non-toxic glue for safer crafting. A small craft knife can help, but only with adult supervision. Sandpaper smooths rough edges on sticks. Tweezers assist in placing small pieces precisely. Keep all tools clean and organized for easy use.
Safe Crafting Practices
Always work in a well-lit area. Keep your workspace tidy to avoid accidents. Use glue in a ventilated room to prevent fumes. Handle sharp tools carefully and store them away after use. Children should craft with adult help. Wash hands after finishing your project to remove glue or dust.
Where To Find Materials
Popsicle sticks come in most craft stores and online shops. Buy sticks in bulk for better prices. Check dollar stores for affordable glue and paint. Reuse sticks from old projects for eco-friendly crafting. Natural materials like leaves or beads add nice touches. Shopping locally supports small businesses and saves shipping time.
Credit: www.youtube.com
Frequently Asked Questions
What Are Easy Diy Popsicle Stick Projects For Beginners?
Simple projects include photo frames, coasters, and small boxes. These require few materials and basic skills, making them perfect for beginners. Start with painting or decorating sticks to personalize your creations.
How Can I Decorate Popsicle Stick Crafts Creatively?
Use paint, markers, glitter, or washi tape to add color and texture. You can also glue buttons, beads, or fabric for a unique look. Experiment with patterns and layering for eye-catching designs.
What Tools Do I Need For Popsicle Stick Projects?
Essential tools include craft glue, scissors, paintbrushes, and markers. Optional tools are a hot glue gun for stronger bonds and clamps to hold pieces while drying. Having these makes crafting easier and more precise.
Are Popsicle Stick Crafts Safe For Kids?
Yes, popsicle stick crafts are generally safe for children. Always supervise younger kids when using scissors or glue. Choose non-toxic paints and materials to ensure a safe crafting environment.
Conclusion
Popsicle stick projects offer fun and creativity for all ages. They help you make unique crafts with simple materials. These projects boost imagination and hand skills. You can create decorations, toys, and gifts easily. Try different designs and enjoy the process.
Crafting with popsicle sticks brings joy and satisfaction. Start small, and watch your ideas grow. Keep experimenting to find what you love most. Simple tools, big smiles. Craft your own fun today!