
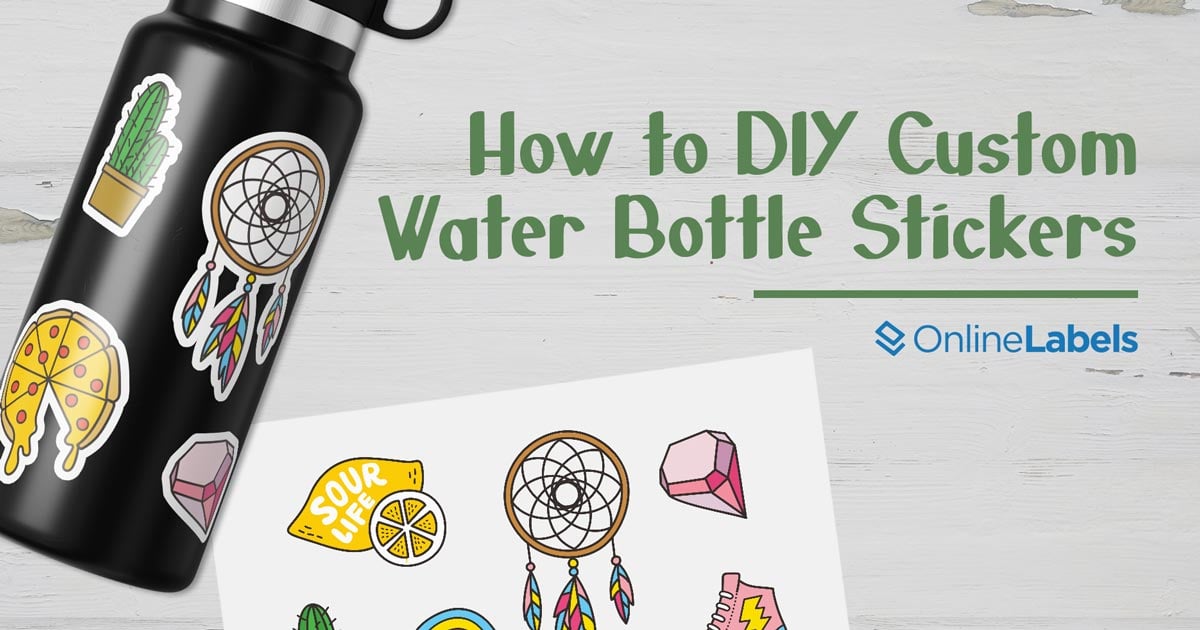
To make custom stickers with Cricut, begin by designing your sticker in Cricut Design Space, importing PNG files, and sizing the image for your project. Set up a template for print and cut, finalize the print settings, and then cut the stickers using your Cricut machine.
A helpful video tutorial is available on YouTube that demonstrates the step-by-step process of making stickers with Cricut. Learn how to make custom stickers with your Cricut machine in just a few simple steps. Whether you want to create personalized stickers for your business, decorate your belongings, or simply express your creativity, Cricut offers an easy and convenient method to bring your sticker designs to life.
By following the instructions in Cricut Design Space and utilizing the print then cut feature, you can design and print your stickers with precision and accuracy. This article will guide you through the process of making custom stickers with Cricut, allowing you to add a personal touch to your crafts or promotional materials.
Designing Stickers In Cricut Design Space
Designing stickers in Cricut Design Space is a simple and fun way to create custom stickers. With easy steps like importing PNG files, sizing images, and setting up print and cut templates, you can quickly cut out your stickers and personalize your belongings.
Designing custom stickers in Cricut Design Space is an exciting and creative process. With the Cricut cutting machine and the Design Space software, you have the freedom to create unique and personalized stickers for various purposes. Whether you want to make stickers for decorating your planner, branding your business, or simply expressing your creativity, Cricut Design Space has all the tools you need. In this section, we will explore two essential steps in designing stickers using Design Space: importing PNG files and scaling and sizing images for your project.
Importing Png Files
To begin designing your own stickers in Cricut Design Space, you need to import your desired images. One of the most common file formats for stickers is PNG because it supports transparent backgrounds. Here’s how you can import PNG files:
- Start by opening Cricut Design Space and creating a new project.
- In the Design Space toolbar, click on the “Upload” button.
- Click on the “Upload Image” button and choose the PNG file you want to import from your computer.
- Once selected, you can preview the image and make any necessary adjustments, such as removing the background or enhancing the colors.
- Click on the “Save” button to save the image to your Design Space library.
- Now that your PNG file is imported, you can easily add it to your sticker design by dragging and dropping it onto the canvas.
Scaling And Sizing Images For Your Project
After importing the PNG files, the next step is to scale and size the images according to your project requirements. Here’s how you can do it:
- Select the imported image on the canvas by clicking on it.
- On the Design Space toolbar, you will find the “Size” option. Click on it to open the size panel.
- Here, you can manually enter the desired dimensions for your sticker or use the resize handles to adjust the size visually.
- If you want to maintain the proportions of the image while resizing, make sure that the lock icon on the size panel is enabled.
- Resize the image until you are satisfied with its dimensions and placement on the canvas.
Setting Up Templates For Print And Cut
Learn how to make custom stickers using Cricut by setting up templates for print and cut. Follow these step-by-step instructions to create personalized stickers with ease.
Creating A Template
To begin making custom stickers with Cricut, the first step is to create a template in Cricut Design Space. Begin by opening the Design Space software and select the “New Project” option. This will open a blank canvas where you can start designing your sticker template.
Adjusting Settings For Print And Cut
Once you have designed your sticker template, it’s time to adjust the settings for print and cut. This step is crucial to ensure that your stickers are printed and cut accurately.
1. Prepare the Design: First, make sure that your design is within the designated print area. Ideally, it should fit within the printable area of your chosen sticker paper.
2. Set Up Material: In Design Space, select the correct material setting. This will depend on the type of sticker paper you are using. For example, if you are using Cricut Printable Sticker Paper, select the corresponding material option.
3. Enable Print Then Cut: In the toolbar, click on the “Make It” button. Design Space will prompt you to print your design. Ensure that your printer is connected and set up correctly. Follow the on-screen instructions to print your design.
4. Select Image Type: After printing, place the printed sticker sheet on your Cricut cutting mat. In Design Space, click on the “Continue” button and select the appropriate image type. Design Space will then scan the printed sheet to detect registration marks.
5. Adjust Cut Settings: Once the registration marks are detected, Design Space will prompt you to adjust the cut settings. Make sure that the correct material setting is selected and adjust the pressure if necessary. This step ensures that your stickers are cut precisely.
6. Load the Cutting Mat: After adjusting the cut settings, load the cutting mat into your Cricut machine. Follow the on-screen instructions to complete the cutting process.
By following these steps and adjusting the settings for print and cut, you can create custom stickers with Cricut that are accurately printed and cut. Remember to experiment with different designs and materials to unleash your creativity and customize your stickers to perfection.
Printing And Cutting Stickers With Cricut
Creating your own custom stickers with Cricut is an exciting and creative process. Once you have designed your stickers in Cricut Design Space, it’s time to print and cut them using your Cricut machine. In this article, we will guide you through the process of finalizing print and cut settings and cutting stickers with your Cricut machine.
Finalizing Print And Cut Settings
Before you start the printing and cutting process, it’s important to ensure that your print and cut settings are correctly set up in Cricut Design Space. Here are the steps to finalize your print and cut settings:
- Open Cricut Design Space and select your sticker design.
- Click on the “Make It” button in the top right corner of the screen.
- Ensure that your Cricut machine is connected and turned on.
- Choose the appropriate material setting for your sticker paper. This can be found in the “Materials” dropdown menu.
- Check the “Print then Cut” option and adjust any necessary settings, such as bleed, image placement, and print quality.
- Preview your design to ensure everything looks correct.
- Click on the “Continue” button to move to the cutting stage.
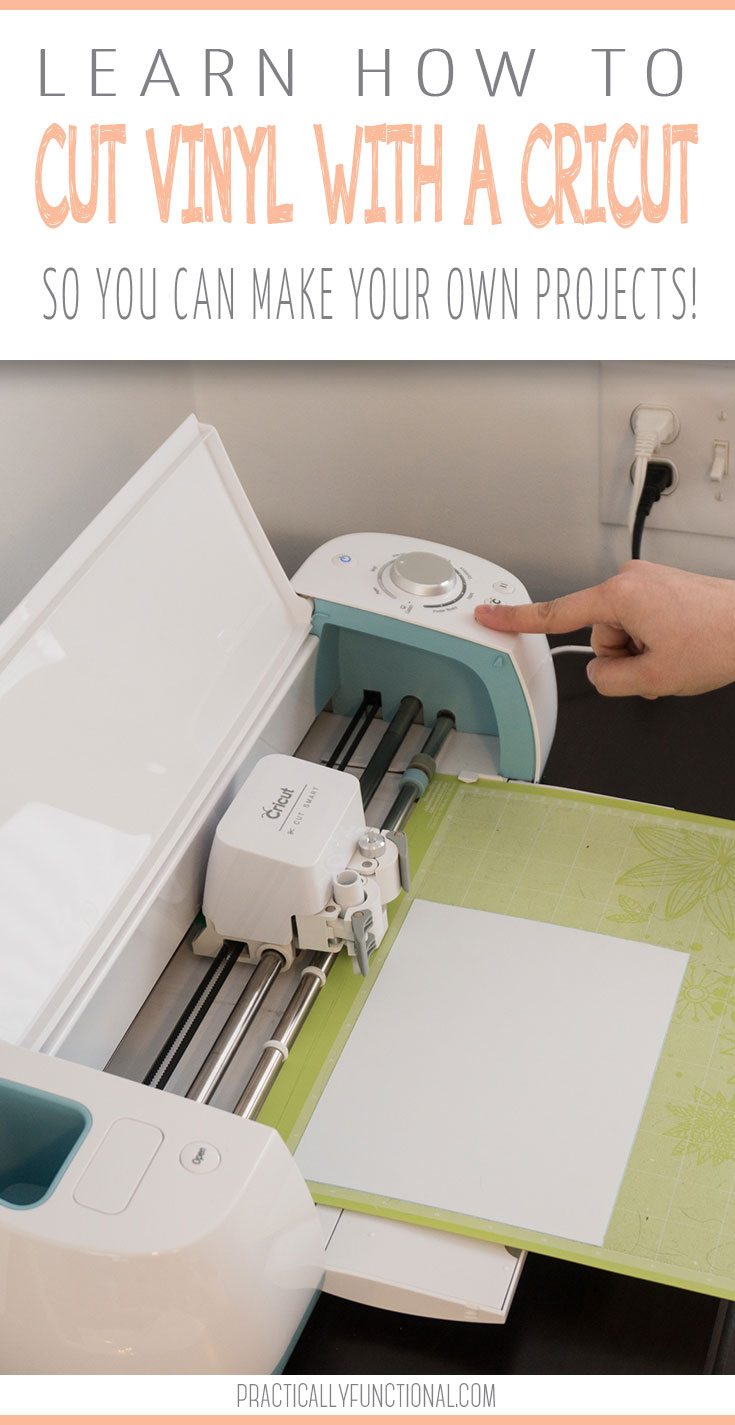
Cutting Stickers With Your Cricut Machine
Once you have finalized your print settings, it’s time to cut your stickers using your Cricut machine. Follow these steps to ensure a successful cut:
- Prepare your Cricut machine by loading the appropriate cutting mat. If using a standard grip mat, make sure it is clean and free of any debris.
- Insert the sticker paper into the cutting mat, making sure it is aligned properly.
- Load the cutting mat into the Cricut machine and press the “Load/Unload” button to secure it in place.
- Return to Cricut Design Space and click on the “Go” button to start the cutting process.
- Watch as your Cricut machine accurately cuts out each individual sticker design.
- Once the cutting is complete, press the “Unload” button to release the cutting mat.
- Carefully remove the sticker paper from the cutting mat, ensuring that none of the stickers get damaged.
Now you have successfully printed and cut your custom stickers using Cricut! You can now peel them off the sticker paper and use them for various purposes such as decorating notebooks, personalizing your belongings, or adding a touch of creativity to your crafts. Enjoy your personalized stickers
Enhancing Stickers With Additional Design Elements
Enhance your custom stickers made with Cricut by adding additional design elements for a personalized touch. From unique graphics to eye-catching typography, these extra elements can make your stickers stand out and capture attention. Elevate your sticker game with Cricut and create one-of-a-kind designs.
Adding Text To Your Stickers
One way to enhance your custom stickers made with Cricut is by adding text. Text can be used to convey a message, add a personal touch, or simply enhance the design. To add text to your stickers in Cricut Design Space, follow these steps:
- Open Cricut Design Space and create or import your sticker design.
- Select the “Text” tool from the toolbar on the left side of the screen.
- Type your desired text in the text box that appears.
- Customize the font, size, and style of the text using the options at the top of the screen.
- Move and resize the text to the desired position on your sticker design.
- Once you’re satisfied with the placement and appearance of the text, select “Make It” to proceed with cutting and printing your stickers.
By adding text to your stickers, you can make them more unique and personalized. Whether you choose to include a catchy phrase, a meaningful quote, or just your name, the possibilities are endless when it comes to customizing your stickers with text.
Utilizing The Offset Tool For Creative Effects
In addition to adding text, another way to enhance your custom stickers is by utilizing the offset tool in Cricut Design Space. The offset tool allows you to create a border or outline around your stickers, giving them a more professional and polished look. Here’s how you can use the offset tool:
- Select the image or shape that you want to add an offset to.
- Click on the “Offset” button in the toolbar at the top of the screen.
- Adjust the offset distance and corner style to achieve the desired effect.
- Choose a color for the offset, or leave it transparent if you prefer.
- Once you’re satisfied with the offset, select “Apply” to add it to your sticker design.
- Proceed with cutting and printing your stickers as usual.
By utilizing the offset tool, you can create unique and eye-catching effects on your custom stickers. Whether you want a bold and prominent border or a subtle and delicate outline, the offset tool allows you to get creative and experiment with different styles.
Tips And Tricks For Successful Sticker Making
Making custom stickers with Cricut is an exciting and creative endeavor. Whether you want to design stickers for personal use, gifts, or even to start your own sticker business, knowing some tips and tricks can greatly enhance your sticker-making experience. In this section, we will discuss two important techniques that every sticker maker should be familiar with: removing background from images and saving sticker designs as PDFs. These techniques will not only help you create professional-looking stickers but also ensure that your designs turn out exactly as you envision them. Read on to discover how to master these essential skills!
Removing Background From Images
One of the key elements of creating custom stickers is being able to remove the background from images. This process allows you to isolate the main subject of your design and make it stand out. To remove the background from an image using Cricut Design Space, follow these steps:
- Import your desired image into Cricut Design Space.
- Select the image and click on the “Remove Background” button.
- Use the Magic Wand tool to click on the areas you want to remove.
- Adjust the tolerance level to refine the selection.
- Click the “Preview” button to see how your image will look without the background.
- Once you are satisfied, click the “Apply” button to remove the background and save your image.
By mastering this technique, you can create beautiful stickers with clean, crisp edges that seamlessly blend into any surface.
Saving Sticker Designs As Pdfs
When it comes to printing and sharing your sticker designs, saving them as PDF files is a smart choice. PDFs ensure that your designs retain their original formatting and can be easily viewed and printed by others. To save your sticker designs as PDFs using Cricut Design Space, follow these steps:
- Click on the “Make It” button in Design Space once you have finalized your design.
- On the “Prepare Mat” screen, click on the “Download” button.
- Select the PDF format from the available options.
- Choose the desired settings for the PDF, such as image quality and page size.
- Click the “Download” button to save your sticker designs as a PDF file.
Saving your designs as PDFs not only makes it easier to print them at home or through a professional printing service but also ensures that others can easily share and reproduce your sticker designs.
Credit: www.practicallyfunctional.com
Frequently Asked Questions For How To Make Custom Stickers With Cricut
How Can I Make Custom Stickers?
To make custom stickers using Cricut, follow these simple steps: 1. Design your sticker in Cricut Design Space. 2. Import and resize your image, and create a sticker template. 3. Finalize your Print and Cut settings. 4. Print your stickers.
5. Cut your stickers using Cricut. It’s a quick and easy process that allows you to create personalized stickers.
Can You Make Custom Labels With Cricut?
Yes, you can make custom labels with Cricut. Making labels is easy and can help you stay organized in various aspects of your life. Cricut Design Space provides templates for creating labels like coffee, flour, and tea. Follow the instructions in this video for a quick how-to guide.
Can I Make My Own Custom Stickers With Cricut?
Definitely! Cricut allows you to create custom stickers easily and accurately. With Cricut Design Space, you can design your own stickers using images, text, and shapes, and then cut them out using your Cricut machine.
How Do I Make Stickers With Cricut Design Space?
To make stickers with Cricut Design Space, simply import your desired images or design elements, arrange them on your canvas, select the “Make It” option, choose “Sticker Paper” as your material, and let your Cricut machine do the cutting for you.
Conclusion
Making custom stickers with Cricut is a fun and creative way to personalize your items. By following the step-by-step instructions in this blog post, you can easily create unique stickers for any occasion. Whether you want to organize your pantry or add a personal touch to your crafts, Cricut makes it easy and convenient.
So get your Cricut machine ready and start making custom stickers that showcase your creativity and style.