
To remove stickers, you can use rubbing alcohol or adhesive removers like Goo Gone. These solutions effectively dissolve the adhesive, making it easier to peel off the sticker without leaving residue.
Now, let’s explore some effective methods for sticker removal.
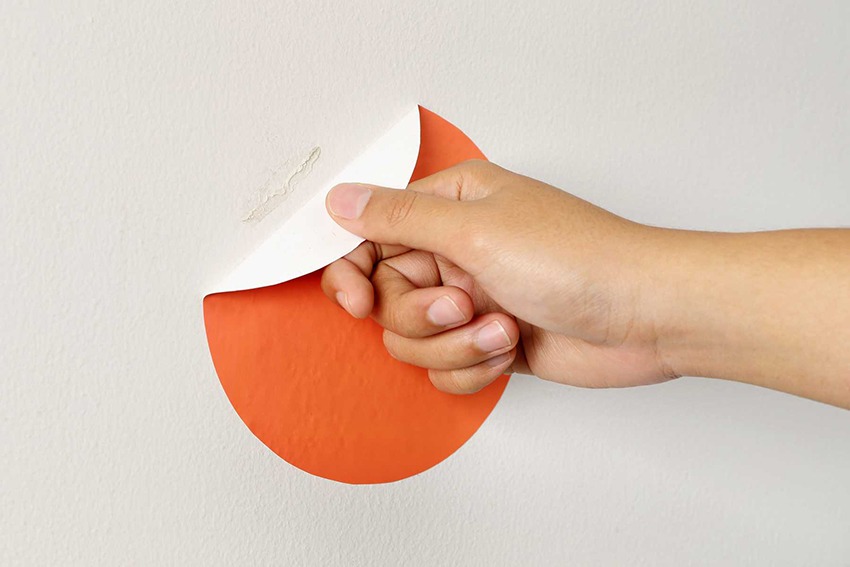
Understanding The Problem
If you’re wondering how to remove stickers effectively, we have the solution for you. Our step-by-step guide will help you understand the problem and provide simple techniques to get rid of stickers hassle-free.
Understanding the Problem Removing stickers can be a daunting task, especially when you’re faced with stubborn residue or delicate surfaces. Whether you’re dealing with a sticker on a glass window, car bumper, or wooden furniture, it’s essential to understand the problem at hand before attempting any removal techniques. In this section, we will explore the factors to consider when removing stickers, why it can be challenging, and the importance of using the right techniques for successful sticker removal. Factors to consider when removing stickers When it comes to sticker removal, there are several factors that need to be taken into account. These factors can vary depending on the surface material, the adhesive used on the sticker, and the overall condition of the sticker itself. Here are a few key considerations: 1. Surface material: Different materials require different approaches to sticker removal. For example, a sticker on a glass surface may require a different technique than one on a painted wall. It’s important to choose a removal method that is safe and effective for the specific surface you’re working on. 2. Adhesive strength: Stickers can have varying levels of adhesive strength. Some may come off easily with a gentle peel, while others may leave behind sticky residue that is harder to remove. Understanding the adhesive strength will help you determine the appropriate removal technique. 3. Sticker age: The age of the sticker can also impact the removal process. Older stickers tend to dry out and become brittle, making them more challenging to remove. It’s crucial to approach older stickers with caution to avoid damaging the underlying surface. Why removing stickers can be challenging Removing stickers may seem like a simple task, but it can often be more challenging than anticipated. Here are a few reasons why sticker removal can pose difficulties: 1. Residue: Even after successfully removing a sticker, it’s common to be left with sticky residue. This residue can be stubborn and difficult to remove, requiring additional time and effort. 2. Delicate surfaces: Removing stickers from delicate surfaces, such as antique furniture or sensitive electronics, requires extra care. Using the wrong technique or harsh chemicals can cause damage or discoloration. 3. Hiding underneath: Stickers often hide underneath layers of dirt, grime, or even paint. This can make it harder to remove the sticker cleanly without leaving any marks or blemishes on the surface. The importance of using the right techniques Using the right techniques is crucial to ensure successful sticker removal without causing damage. Here’s why it matters: 1. Avoiding damage: Incorrect removal techniques can lead to surface damage, such as scratches, discoloration, or residue that is harder to remove. By using the right techniques, you can minimize the risk of damaging the underlying surface. 2. Efficiency: Using the correct removal methods can make the process more efficient. This means less time spent struggling with sticky residue or multiple attempts at removing the sticker. 3. Cost-effective: Proper techniques can save you money by eliminating the need for expensive professional services or replacement of damaged surfaces. Remember, different sticker removal techniques work best for different scenarios, so it’s essential to choose the approach that suits your specific situation. By understanding the problem, considering the factors, and using the right techniques, you can successfully remove stickers without any hassle.
:strip_icc()/assorted-cleaning-solutions-plus-peanut-butter-594c8e41-6ca410ecabc646959db37d9888bffbca.jpg)
Credit: www.bhg.com
Preparing The Surface
Before you embark on the task of removing stickers, it’s crucial to properly prepare the surface to ensure a successful removal without causing any damage. In this article, we will guide you through the process of preparing the surface, starting with gathering the necessary tools and materials.
Gathering The Necessary Tools And Materials
To tackle sticker removal effectively, you will need a few essential tools and materials. By having these items on hand, you will be able to streamline the process and achieve optimal results:
| Tools | Materials |
|---|---|
|
|
Having these tools and materials ready will ensure you have everything you need to tackle the pre-removal steps efficiently.
Cleaning The Surface Before Removal
Once you have gathered the necessary tools and materials, it’s time to clean the surface prior to sticker removal. This step is essential as it helps remove any dirt, grime, or debris that may interfere with adhesion or impact the surface upon sticker removal.
- Start by filling a bucket with warm water.
- Add a small amount of mild dish soap to create a soapy solution.
- Dip a clean cloth or sponge into the soapy solution and gently scrub the area around the sticker.
- Rinse the area with clean water.
- Dry the surface using a clean cloth or let it air dry completely.
By thoroughly cleaning the surface, you ensure optimal adhesion when removing the sticker, reducing the likelihood of leaving any adhesive residue behind.
Removing Any Residual Adhesive
Even after removing the sticker, it’s common to find residual adhesive left behind. Don’t fret! It’s relatively simple to tackle this last bit of stickiness:
- Put on rubber gloves to protect your hands.
- Apply a small amount of isopropyl alcohol or adhesive remover onto a clean cloth.
- Gently rub the cloth over the area with residual adhesive.
- Continuously wipe until all the adhesive is dissolved and removed.
Remember to test the chosen adhesive remover on a small inconspicuous area before applying it to the entire surface to ensure compatibility and avoid any potential damage.
By following these steps, you will effectively prepare the surface for sticker removal, making the task easier and preventing any unwanted damage or residue. Now that you’ve completed the surface preparation, you’re ready to embark on the actual sticker removal process.
Removing Stickers From Different Surfaces
Removing stickers can be a challenging task, especially when they are stuck on different surfaces. Whether it’s glass, plastic, wood, or metal, each surface requires a different approach to ensure the sticker comes off without leaving any residue behind. In this blog post, we will discuss effective methods for removing stickers from these various surfaces.
Removing Stickers From Glass Surfaces
Glass surfaces are prone to scratches and require gentle handling when removing stickers. Here are some steps you can follow to remove stickers from glass surfaces:
- Begin by peeling off as much of the sticker or label as possible using your fingers or a plastic scraper. Be careful not to scratch the glass.
- Apply a small amount of rubbing alcohol or adhesive remover to a clean cloth.
- Gently rub the sticker residue in circular motions until it starts to loosen.
- Use a clean cloth to wipe away the residue. Repeat this process if necessary.
Removing Stickers From Plastic Surfaces
Plastic surfaces require a bit more caution to prevent damage during sticker removal. Here’s how you can safely remove stickers from plastic surfaces:
- Start by using your fingernail or a plastic scraper to lift the edge of the sticker.
- Apply a small amount of vegetable oil or a product specifically designed for adhesive removal onto the sticker.
- Allow the oil or adhesive remover to soak into the sticker for a few minutes.
- Gently peel off the sticker from one corner, using slow and steady motions.
- Use a cloth soaked in warm soapy water to wipe away any remaining residue.
Removing Stickers From Wooden Surfaces
Removing stickers from wooden surfaces requires a delicate approach to avoid damaging the finish. Here’s how you can safely remove stickers from wooden surfaces:
- Start by gently peeling off as much of the sticker or label as possible with your fingers.
- Dampen a soft cloth with warm soapy water.
- Gently rub the sticker residue using the damp cloth, applying light pressure.
- If the residue persists, add a small amount of rubbing alcohol to the cloth and continue rubbing until the residue is removed.
- Wipe the surface clean with a dry cloth to remove any leftover moisture.
Removing Stickers From Metal Surfaces
Metal surfaces can often be more resistant to sticker removal due to their durability. Follow these steps to effectively remove stickers from metal surfaces:
- Begin by peeling off as much of the sticker or label as possible using your fingers or a plastic scraper.
- If any adhesive residue remains, apply a small amount of vinegar or nail polish remover onto a cloth.
- Gently rub the residue with the cloth until it starts to loosen.
- Use a clean cloth to wipe away the residue, ensuring all traces are removed.
- Finish by cleaning the metal surface with a mild soap and water solution.
By following these methods, you can successfully remove stickers from different surfaces without damaging or leaving sticky residue behind. Remember to always be gentle and cautious when dealing with delicate materials, allowing for a smoother sticker removal process.
Special Techniques And Tips
Removing stickers can be a tedious task, especially when they are stubborn or stuck on delicate surfaces. However, with the right techniques and tips, you can make this process a breeze. In this article, we will explore some special methods that can help you remove stickers effectively without causing any damage. So, let’s dive right in!
Using Heat To Loosen Adhesive
If you’re dealing with a sticker that just won’t budge, using heat can be a game-changer. Applying heat to the sticker helps in loosening the adhesive, making it easier to peel off. Here’s how you can do it:
- Use a hairdryer on high heat settings and point it towards the sticker for about 30 seconds. Remember to maintain a safe distance to avoid any damage to the surface.
- Once heated, use your fingers or a plastic scraper to gently lift the edge of the sticker.
- Continue applying heat and peeling until the whole sticker is removed.
Using Solvents For Stubborn Stickers
When regular methods fail, using solvents can be highly effective in removing stubborn stickers. Solvents work by dissolving the adhesive, making it easier to remove the sticker. Here’s what you need to do:
- Choose a solvent that is safe to use on the surface you’re working with. Rubbing alcohol, vinegar, or adhesive removers are commonly used options.
- Apply the solvent to a clean cloth or cotton ball.
- Gently rub the sticker using the saturated cloth, allowing the solvent to penetrate the adhesive.
- After a few minutes, try peeling off the sticker. If needed, reapply the solvent and repeat the process until the sticker is completely removed.
Removing Stickers From Delicate Surfaces
Delicate surfaces require extra care during the sticker removal process to prevent any damage. Here’s how you can remove stickers from delicate surfaces:
- If possible, start by using your fingers to gently lift the corners of the sticker. Avoid applying excessive force.
- Use a plastic card or a soft, non-abrasive scraper to slowly lift the sticker while supporting the surface underneath.
- If the sticker leaves behind any residue, dab a cloth or cotton ball in warm soapy water and gently wipe the area. Avoid using harsh chemicals on delicate surfaces.
- Pat the surface dry with a clean cloth.
Preventing Damage During The Removal Process
While removing stickers, it’s crucial to take precautions to prevent any damage. Here are some tips to keep in mind:
- Avoid using sharp objects that can scratch or leave marks on the surface. Opt for plastic scrapers or non-abrasive tools instead.
- Test any solvents or adhesive removers on a small, inconspicuous area before applying them to the entire surface.
- Follow the recommended instructions and safety guidelines provided by the solvent manufacturer.
- Be patient and take your time to gently peel off the sticker without rushing the process.
- Clean the surface thoroughly after removing the sticker to remove any residue.
By following these special techniques and tips, you’ll be able to remove stickers efficiently and without any damage. Remember to always adapt the method based on the specific surface and sticker type you are working with. With a little patience and the right approach, sticker removal will become a hassle-free task!
Aftercare And Maintenance
Proper aftercare and maintenance are crucial to ensure a clean and pristine surface once stickers have been removed. By following these simple steps, you can ensure that no residue is left behind and prevent future build-up.
Cleaning The Surface After Sticker Removal
Cleaning the surface after sticker removal is important to get rid of any sticky residue or adhesive that may be left behind. Here are some steps you can follow:
- Gently peel off the sticker using your fingers or a plastic scraper, being careful not to damage the surface.
- Use a mild dish soap or adhesive remover specifically designed for the surface to clean off any remaining residue.
- Apply the soap or adhesive remover to a clean cloth and gently rub it on the affected area in circular motions.
- Rinse the surface with warm water and dry it thoroughly with a soft, lint-free cloth.
By cleaning the surface after sticker removal, you can ensure that it looks clean and rejuvenated.
Applying Protective Coatings
To protect the surface from future sticker residue or damage, applying a protective coating is highly recommended. Here’s how you can do it:
- Choose a suitable protective coating for the specific surface. For example, a clear varnish for wooden surfaces or an automotive wax for car exteriors.
- Clean the surface thoroughly and ensure it is completely dry before applying the protective coating.
- Apply the protective coating evenly using a clean cloth or a brush, following the manufacturer’s instructions.
- Allow the protective coating to dry completely, which could take a few hours or overnight.
By applying a protective coating, you can safeguard the surface from sticker residue and maintain its appearance for a longer time.
Preventing Future Sticker Residue Build-up
To prevent future sticker residue build-up and keep the surface looking clean and pristine, follow these preventive measures:
- Avoid placing stickers on sensitive surfaces such as painted walls or delicate materials.
- Before applying stickers, ensure that the surface is clean and dry, free from any dirt or dust.
- Consider using removable stickers or adhesive-free alternatives for temporary decorations.
- Regularly inspect the surface for any signs of sticker residue and promptly remove them using the cleaning methods mentioned above.
By taking preventative measures, you can maintain a sticker-free and flawless surface.
Frequently Asked Questions On How To Remove Stickers
How Do You Remove Sticky Stickers?
To remove sticky stickers, follow these steps: 1. Apply heat to the sticker using a hairdryer. 2. Gently peel off the sticker from one corner. 3. If residue remains, rub it off with a mixture of baking soda and water. 4.
Rinse the surface and dry it completely.
How Do You Get Stickers Off Surfaces?
To remove stickers from surfaces, gently peel them off using your fingers or a plastic scraper. For stubborn stickers, apply heat from a hairdryer to soften the adhesive. Rubbing alcohol or vinegar can also help dissolve sticky residue. Clean the area afterward to remove any remaining residue.
How Do You Remove Dried On Stickers?
To remove dried on stickers, apply heat using a hairdryer or heat gun and peel slowly. You can also use rubbing alcohol, vinegar, or oil-based products to loosen the adhesive. Gently scrape off any remaining residue with a credit card or plastic scraper.
How Can I Remove Stickers Without Damaging The Surface?
To remove stickers without damaging the surface, you can use a hairdryer to heat the sticker, then gently peel it off using your fingers or a plastic card. You can also try using rubbing alcohol or vinegar to dissolve the adhesive and make it easier to remove.
Remember to test these methods on a small, inconspicuous area first to ensure they won’t cause any damage.
Conclusion
Removing stickers can be a challenging task, but with the right techniques and tools, it can be done easily. From using heat to soaking in adhesive removers, there are various methods to consider. It is important to approach the task with caution to avoid damaging the surface underneath.
By following these steps, you can successfully remove stickers and restore the appearance of your belongings. Say goodbye to pesky stickers and enjoy a sticker-free environment!