

To remove sticker gunk effectively, apply either rubbing alcohol or white vinegar to the affected area. Let it sit for a few minutes before wiping clean.
Dealing with stubborn sticker residue can be an annoying task. It’s common to find such gunk on various surfaces, from glass and plastic to wood and ceramics. Simple household items like vinegar and rubbing alcohol can act as safe and potent solutions.
These items work to dissolve the adhesive bond, making cleanup a breeze without damaging most surfaces. Despite the diverse recommendations available online, these ingredients remain popular due to their effectiveness and accessibility. Understanding how to use them correctly can save time and preserve the integrity of your items, making the removal process straightforward and stress-free.
Sticky Situations: Dealing With Residue
Sticky labels and tape can leave a mess. Your new glassware, electronics, or furniture might have unsightly sticker gunk. Removing this sticky residue is not easy. This blog post guides you through the best ways to tackle these sticky situations.
The Challenge Of Sticker Gunk
Sticker gunk can be stubborn and frustrating. It often clings to surfaces, resisting most casual cleaning attempts. Some stickers leave behind strong adhesive, making removal a challenge.
Why Sticker Residue Is Troublesome
Sticker residue is not just an eyesore; it can also damage surfaces. The longer it stays, the harder it is to remove. Below are key reasons why sticker gunk is particularly troublesome:
- Attracts Dust: Sticky surfaces collect dust and dirt.
- Difficult to Clean: Residue can withstand standard cleaning products.
- May Damage Surfaces: Aggressive removal may scratch or peel surfaces.

Credit: www.amazon.com
Concocting The Perfect Solution
Struggling with sticky residue? Finding the ideal mix to tackle sticker gunk is crucial. The secret lies in using the right ingredients that safely break down the adhesive. Below, discover how to create a potent yet safe concoction for your sticker removal needs.
Natural Ingredients For Gunk Removal
Let’s dive into nature’s pantry to find effective solutions for gunk removal. Here are some top picks:
- Vinegar – Acidity cuts through the residue.
- Baking Soda – Ideal for a gentle scrub.
- Oil (Olive or Coconut) – Breaks down the glue.
- Lemon Juice – Citric acid works wonders.
Mix these ingredients in different combinations to tackle various types of adhesive. For instance, mix equal parts of vinegar and baking soda for a homemade paste, or apply oil with a dash of lemon juice for a softer approach.
Diy Vs Commercial Products
When choosing between DIY mixtures and store-bought solutions, consider these points:
| DIY Products | Commercial Products |
|---|---|
|
|
Analyze the type of surface and the gunk’s tenacity when deciding. A natural DIY solution can be just as effective without the added chemicals of commercial products. Always perform a spot test to ensure that your chosen method does not damage the surface.
Solution One: Oil-based Remedies
Sticker residue is a common nuisance that can ruin the appearance of surfaces. Applying oil-based remedies is a safe and effective method to tackle this problem. The oils break down the adhesive properties, making it easier to wipe away the mess.
Using Cooking Oils
Cooking oils like olive or vegetable oil are handy for removing sticker gunk. To use, pour a small amount onto a cloth and press onto the residue. Allow a few minutes for the oil to work its magic.
- Test a small area first to ensure no discoloration occurs.
- Let the oil sit for a while, aiding in the loosening of the gunk.
- Wipe away with a clean cloth or kitchen towel.
Applying Oil To Different Surfaces
It’s important to consider the surface material when applying oil. See the table below for guidance:
| Surface | Instructions |
|---|---|
| Glass | Apply generously, oils do not harm glass surfaces. |
| Wood | Use sparingly, wipe off excess to prevent absorption. |
| Plastic | Apply a thin layer, some plastics can be sensitive to oils. |
| Metal | Ensure all oil is removed to avoid a greasy residue. |
Credit: www.architecturaldigest.com
Solution Two: Vinegar’s Versatile Power
Vinegar’s versatile power shines as Solution Two for sticker gunk removal. White vinegar is not just a kitchen staple, but also a mighty adhesive dissolver. Its acidic nature effortlessly breaks down stubborn sticker residue without the use of harsh chemicals. Packed with natural cleaning abilities, let’s dive into the methods using white vinegar to free your items from pesky sticker gunk.
Soaking In White Vinegar
Embarking on the removal process begins with a simple yet effective soak. Here’s how:
- Warm white vinegar in a microwave or stovetop just slightly above room temperature for better results.
- Submerge the sticker-laden area of the object into the warm vinegar. If immersion isn’t possible, dampen a cloth or paper towel with vinegar and place it over the residue.
- Let it sit for 5 to 10 minutes. Stubborn gunk may require longer.
- Gently scrape the now-softened residue with a plastic scraper or credit card. For delicate surfaces, use your fingers or a soft brush.
Proper Application Techniques
Effective vinegar application ensures residue-free results. Follow these steps:
- Test first on a small, inconspicuous area to prevent discoloration or damage.
- Apply vinegar using a spray bottle or a soaked cloth for precision and control.
- Rub gently in a circular motion, gradually increasing pressure if needed.
- Wipe the surface clean with a damp cloth to remove any vinegar and loosened adhesive.
- Repeat if necessary, ensuring the surface is completely clear of sticker gunk.
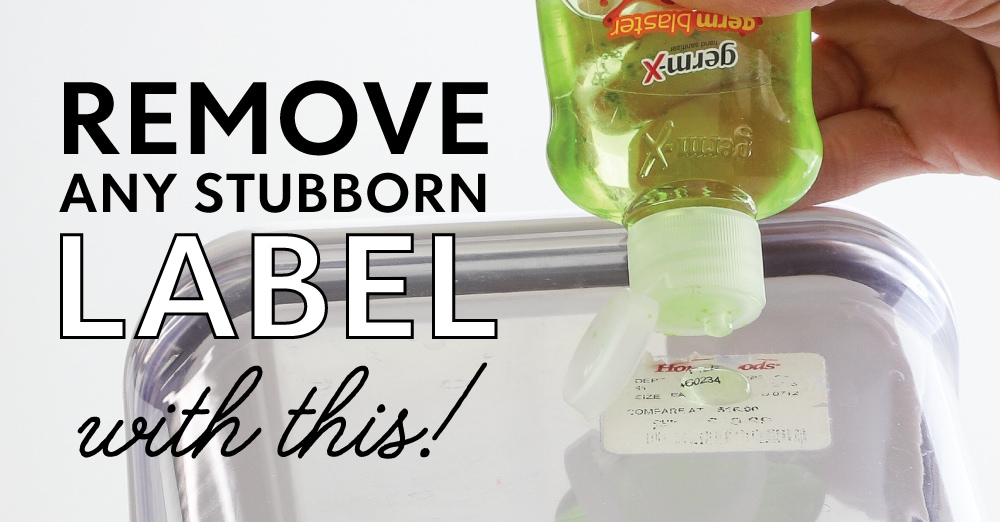
Solution Three: Alcohol As A Residue Fighter
Struggling with stubborn sticker residue? Your solution might be closer than you think. Reach into your medicine cabinet for a common household hero – isopropyl alcohol. This simple substance is known to break down adhesives with ease, making your cleaning task a breeze. Let’s explore how it works.
Isopropyl Alcohol To The Rescue
Isopropyl alcohol, often found in rubbing alcohol, can effectively dissolve the sticky mess left by stickers. This is how it tackles the task:
- Breaks down the molecular structure of the gunk.
- Evaporates quickly, leaving no residue.
- Does not damage most surfaces when used correctly.
Simple steps for success:
- Moisten a cloth or cotton ball with isopropyl alcohol.
- Press onto the sticky area for a few minutes.
- Gently rub away the residue.
- Repeat if necessary, and clean the surface with water afterwards.
Safety Precautions
If you decide to use isopropyl alcohol, safety comes first. Always keep these precautions in mind:
- Work in a well-ventilated area: Alcohol fumes can be strong.
- Avoid open flames: Alcohol is flammable.
- Wear gloves: Prevents skin irritation.
- Test on a small area: Ensure no damage to surfaces.
Solution Four: Baking Soda Paste
Baking soda paste stands as a champion in the arena of sticker gunk fighters. It’s safe, non-toxic, and readily available in nearly every household. This remarkable substance gently eradicates sticky residues without harming surfaces. Ready to harness the power of baking soda? Let’s dive into creating this magical paste. Baking Soda Mix Instructions.
Mixing Baking Soda And Water
Making the paste is quick and easy. Grab the following items:
- Baking soda – a mild abrasive
- Water – to form a paste
- A small bowl – for mixing
- A spoon or spatula – for stirring
Mix three parts baking soda to one part water in the bowl. Stir until it forms a thick paste. If the mixture is too liquid, add more baking soda. If too thick, add water cautiously. Baking Soda Application.
Applying And Removing With Care
Apply the paste to the sticker residue. Use your fingers or a spatula. Cover the gunk completely. Let it sit for about 15 minutes.
Once the time’s up, gently rub the area with a soft cloth or sponge. Work in circular motions to lift the residue. Rin’t be too harsh. Some surfaces scratch easily.
After removing the gunk, wipe the surface clean with a damp cloth. If any residue remains, repeat the process. Your spot should now be clean and gunk-free!
Solution Five: Citrus Wonder
Nature offers a powerful solution for removing annoying sticker gunk – citrus! Citrus fruits contain natural acids that dissolve sticky residues without harming most surfaces. This method is safe, effective, and environmentally-friendly.
Lemon Juice And Its Uses
Lemon juice is not just for recipes. Applied properly, its natural acidity tackles adhesive remnants with ease. Follow these steps:
- Squeeze fresh lemon juice onto the gunky area.
- Let it sit for a few minutes.
- Gently scrub off the residue.
- Rinse the area with warm water.
For stubborn spots, reapply and repeat.
Citrus-based Commercial Removers
Prefer a ready-to-use option? Go for a citrus-based sticker remover. They contain compounds similar to lemon juice but are formulated for potency. Here’s what makes them great:
- They work quickly and effectively.
- Suitable for a variety of surfaces and sticker types.
- They’re often enriched with pleasant scents.
| Product | Features | User Ratings |
|---|---|---|
| Citrus Magic | Biodegradable, Fresh Orange Scent | 4.5/5 Stars |
| Goo Gone Citrus | Multi-Surface, Citrus Power | 4.7/5 Stars |
Pick a product based on your needs and follow the label instructions for the best results.
Sensitive Surfaces And Protection
Removing sticker gunk from delicate items requires extra care. The goal is to leave the surface gunk-free without leaving a mark. In this section, we focus on how best to treat and protect sensitive surfaces such as wood, antique items, or plastic electronics during the cleanup process.
Treating Delicate Materials
When dealing with sensitive materials, always choose the gentlest cleaning methods. Start with minimal force and escalate only if necessary. Here’s how to tenderly treat different materials:
- Wood: Use oil or a mild soap solution to avoid stripping any finish.
- Electronics: Opt for a soft microfiber cloth with isopropyl alcohol, dabbing gently.
- Antiques: A professional may be best, but for DIY, proceed with extreme caution and test small areas first.
Preventing Damage During Cleanup
Preventing damage is key during sticker residue removal. Consider these steps to avoid harming your surfaces:
- Identify the material of the surface affected.
- Select an appropriate cleaning agent that is friendly to the material.
- Perform a spot test on a hidden area before full application.
- Use tools like plastic scrapers or credit cards to gently lift residue.
- Apply cleaning solutions with a soft, clean cloth to minimize abrasion.
- Rinse or wipe off the area with water to remove any chemical traces.
Treating each material with its specific care instructions ensures the longevity and beauty of your sensitive items remain intact.
From Goo To Glory: Conclusion
Embarking on the journey to eliminate sticker residue can seem daunting, but with the right tools and techniques, it transitions from hassle to triumph. This final part of our guide will recap the efficient strategies that lead to a gunk-free surface and share a few closing thoughts on the journey from goo to glory.
Summarizing Efficient Techniques
Diverse methods were explored to tackle the stubborn residue stickers leave behind. Here’s a brief summary:
- Oil-based substances such as cooking oil or peanut butter work wonders on sensitive surfaces.
- Using isopropyl alcohol, vinegar, or WD-40 effectively removes residue without harsh chemicals.
- Commercial removers like Goo Gone offer a powerful solution for more robust materials.
- Heat application with a hairdryer or warm cloth can gently lift gunk away.
Final Thoughts On Sticker Gunk Removal
Sticker residue is an annoyance no more with these quick and effective techniques. Whether it’s a cherished collectible, a car window, or everyday household items, the right method can restore them to their pristine state. Patience and care paired with targeted treatments guarantee success. A gunk-free surface awaits, witnessing the glory of a clean, adhesive-free finish.
Credit: thehomesihavemade.com
Frequently Asked Questions Of Sticker Gunk Removal
How Do You Remove Sticker Gunk?
To remove sticker gunk, apply rubbing alcohol or white vinegar to a cloth, press onto the area, wait a few minutes, then wipe clean.
How Do You Remove Sticker Residue Without Damaging Paint?
To remove sticker residue without damaging paint, gently apply a solution of warm soapy water, and carefully wipe away the residue. Alternatively, use a commercial adhesive remover like Goo Gone, following the product instructions.
How Do You Remove Sticky Tape Residue?
To remove sticky tape residue, warm up the area with a hairdryer and peel off, or lightly rub the spot with olive oil or vinegar and wipe clean.
Does Vinegar Remove Sticker Residue?
Yes, vinegar can effectively remove sticker residue. Apply vinegar to the adhesive area, allow it to soak, and then wipe clean.
Conclusion
Removing stubborn sticker gunk doesn’t have to be a hassle. Whether you’ve tackled glass, wood, or plastic, the right method makes all the difference. Remember, gentle solvents and patience are your allies in preserving surfaces. Embrace these tips to keep items gunk-free and looking great.