
Create a design with stick-on rhinestones by choosing a pattern and affixing stones with adhesive. Ensure a clean surface for the best stick.
Creating designs with stick-on rhinestones is a fantastic way to add sparkle and personality to various items. Whether you’re aiming to embellish clothing, accessories, or home decor, using rhinestones can elevate your project. The process is simple and requires minimal materials, making it an accessible craft for DIY enthusiasts of all levels.
It is important to select the right size and color of rhinestones to complement your design vision. Preparing the surface by cleaning it ensures the rhinestones adhere properly and stay in place. With careful placement and a bit of creativity, you can transform ordinary objects into dazzling, eye-catching pieces.
The Allure Of Stick-on Rhinestones
The allure of Stick-On Rhinestones often lies in their simplicity and transformative power. These tiny, shimmering accents add a touch of glamour and sophistication to any design. Whether it’s to jazz up everyday items or to bring sparkle to a special event, stick-on rhinestones offer an easy route to a dazzling aesthetic.
Sparkling Appeal In Fashion
Fashion enthusiasts embrace stick-on rhinestones for their versatility and sparkle. Easy to apply, they instantly elevate garments and accessories. Designers often employ rhinestones to create intricate patterns or add highlights to their pieces, achieving a luxurious look without the need for sewing or permanent alterations. Opt for stick-on rhinestones to:
- Accentuate features on clothing such as collars and cuffs.
- Create eye-catching motifs on bags, shoes, and hats.
- Give a glittering edge to casual wear.
Accessibility For Diy Enthusiasts
DIY projects and crafts shine with the addition of stick-on rhinestones. They are perfect for at-home designers of all ages, offering a fun experience without the need for professional tools. Just peel, stick, and enjoy the transformation. Their accessibility makes them a favorite for creating:
- Custom phone cases with personal flair.
- Decorative home accents like vases and picture frames.
- Bespoke gifts with a personal touch.
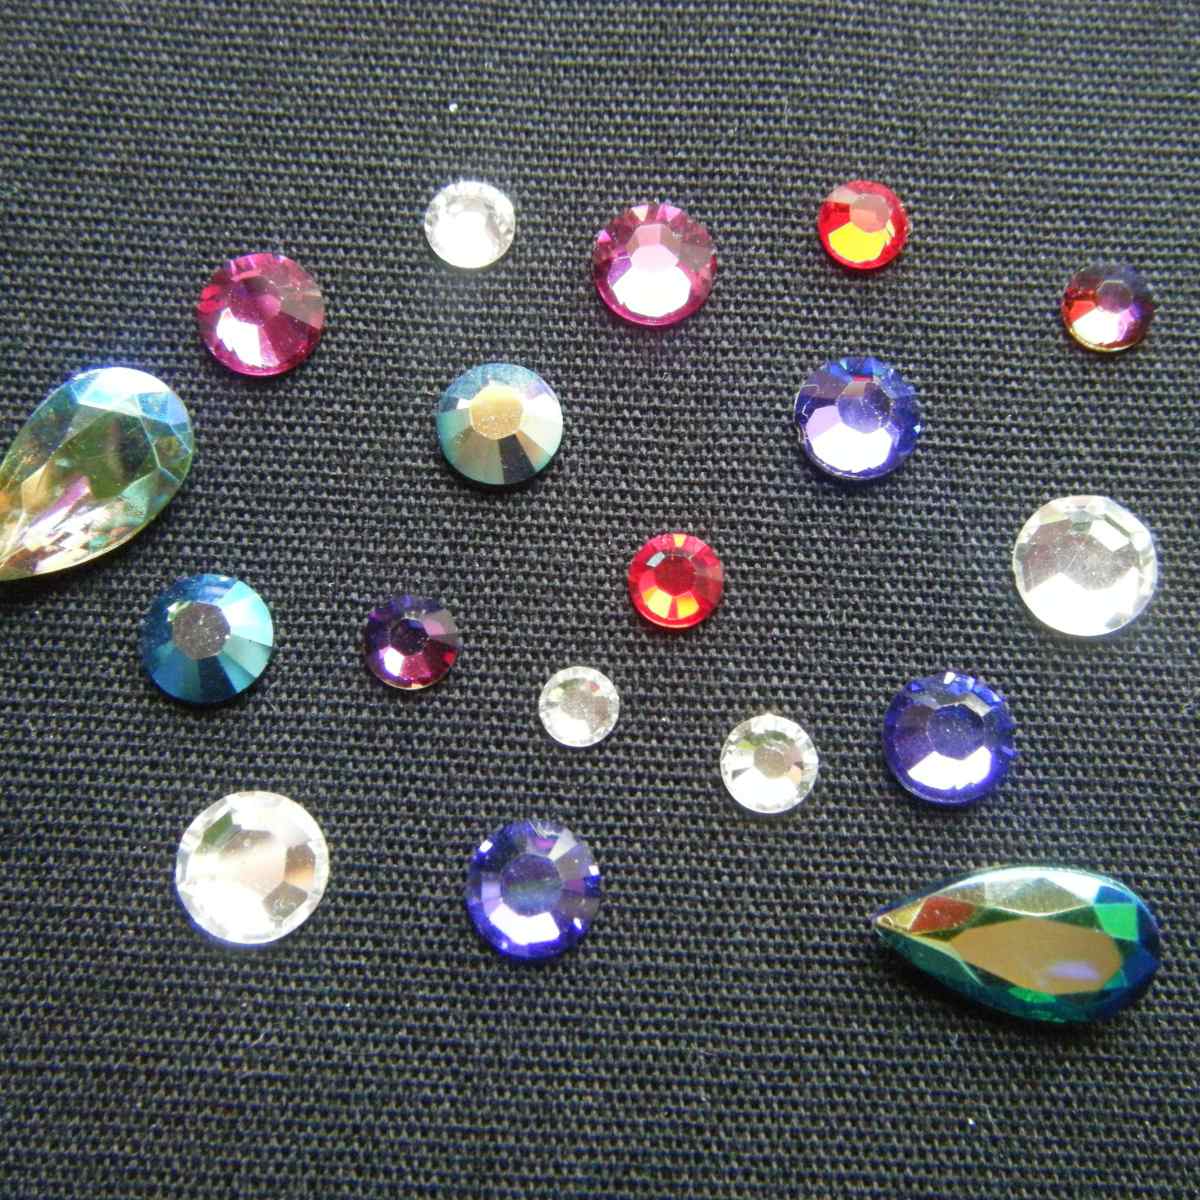
Choosing The Right Rhinestones
Crafting a design with stick-on rhinestones can add sparkle to any project. Before diving into the creative process, it’s crucial to select the perfect rhinestones. The right gems will ensure your design shines.
Color And Size Selection
Colors and sizes set the tone for your design. Color matching is important to complement the project’s overall aesthetic. Use a color wheel for guidance. Sizes vary; smaller stones work well for detailed work, while larger ones make a bold statement.
| Size (mm) | Usage |
|---|---|
| 1.5-2 | Finer details |
| 3-4 | Accent pieces |
| 5+ | Centerpieces |
Quality And Adhesive Strength
High-quality rhinestones have better faceting and shine longer. Look for rhinestones with strong adhesive backing. They ensure a lasting hold. Check product reviews to gauge real-world performance.
- Inspect the cut and clarity.
- Choose stones with strong adhesives.
- Avoid rhinestones that easily fall off.
Preparing Your Materials And Workspace
Creating a dazzling design with stick-on rhinestones starts with proper preparation. A smooth process requires the right tools and a well-organized space. This ensures efficiency and a fantastic end result. Let’s dive into setting up your workspace and gathering all the materials you’ll need.
Gathering Essential Tools
Starting with the essential tools:
- Stick-on Rhinestones: Available in various sizes and colors.
- Tweezers: For precision placement without finger oils interfering.
- Transfer Paper: If using a template for your design.
- Scissors: For cutting shapes or trimming away excess material.
- Design Template: Optional, for intricate patterns or guidance.
With these tools, you’re ready to work on your sparkling creation.
Setting Up A Clean And Organized Area
An organized workspace makes things easier:
- Choose a flat, clean surface for stability and cleanliness.
- Ensure good lighting to see your design clearly.
- Keep your tools within reach and sort your rhinestones by size and color.
- Have a designated spot for waste like paper backings and excess material.
With a tidy area, you’ll prevent the loss of your precious rhinestones and streamline your creative process.

Credit: seamssensational.com
Designing Your Project
Welcome to the dazzling world of DIY crafts with stick-on rhinestones! Transforming ordinary items into sparkly masterpieces is both fun and easy. Below, you’ll learn how to conceptualize and execute a beautiful design. Let’s dive into creating your project, with a focus on the planning phase that sets the stage for a bedazzled finish!
Sketching Creative Patterns
Begin with a blank canvas, be it paper or digital. Drawing beforehand helps visualize the end result. Use pencils or software to outline. This process sparks creativity and guides rhinestone placement.
- Think of shapes and motifs you love.
- Consider themes such as nature, geometric, or abstract.
- Match patterns with the object’s purpose and style.
- Keep designs simple for elegance, or detailed for intricacy.
- Use color pencils to mimic rhinestone colors.
Planning The Placement Of Rhinestones
Positioning each rhinestone correctly is key. Map out where every stone will go. Think about the project’s size and the rhinestones’ sizes.
| Size of Rhinestones | Placement Tip |
|---|---|
| Small | Perfect for fine details or tight spaces. |
| Medium | Good for filling areas and creating patterns. |
| Large | Use as focal points or to make a bold statement. |
- Balance the layout, spreading colors and sizes evenly.
- Use tweezers for precise application.
- Practice layout on a flat surface first.
- Keep symmetry in mind for a harmonious look.
With your design sketched and placement planned, you’ll be ready to create your sparkling masterpiece. The joy is in the journey; soon, your project will shine bright!
Applying Stick-on Rhinestones
Embarking on a glittering project? Stick-on rhinestones transform the ordinary into extraordinary. Perfect for DIY enthusiasts, they’re easy to use and add instant glam. Follow these steps to get a sparkling, durable design.
Techniques For Firm Application
Ensuring rhinestones stay put is crucial. Here’s how:
- Clean the surface: Remove dirt for a better stick.
- Peel carefully: Use tweezers to avoid finger oils.
- Press firmly: Secure each stone for a few seconds.
- Let it set: Wait 24 hours before using the item.
| Step | Task | Tip |
|---|---|---|
| 1 | Clean and dry | Improves adhesion |
| 2 | Remove with tweezers | Keeps oils away |
| 3 | Press down hard | Secures placement |
Tips For Symmetry And Spacing
Create a balanced design with these tips:
- Use a ruler or tape for even spacing.
- Mark symmetry points with a pencil first.
- Start from the center, working your way out.
Remember to step back and check the overall look frequently. Adjust as needed to ensure your design appears visually pleasing from all angles.
Credit: feltmagnet.com
Finishing Touches And Care
As you admire your sparkling design with stick-on rhinestones, a few final steps ensure lasting beauty. Proper finishing touches and care keep your creation dazzling. Let’s lock in that shine and secure your hard work.
Securing Loose Edges
After sticking rhinestones, some edges might not lay flat. Take these important steps:
- Inspect the edges: Look for any rhinestones sticking out.
- Extra adhesive: Apply a small amount of clear-drying glue under loose edges.
- Press firmly: Gently push down the edges for secure adhesion.
- Allow to dry: Wait for the glue to set completely before handling.
Maintaining Rhinestone Brilliance
Rhinestones should sparkle, always. To maintain their shine:
- Gentle cleaning: Wipe with a soft, damp cloth. Avoid harsh chemicals.
- Storage matters: Store your design in a cool, dry place.
- Avoid scratches: Keep away from abrasive surfaces.
By following these simple care tips, your rhinestone design will maintain its eye-catching gleam for years to come!
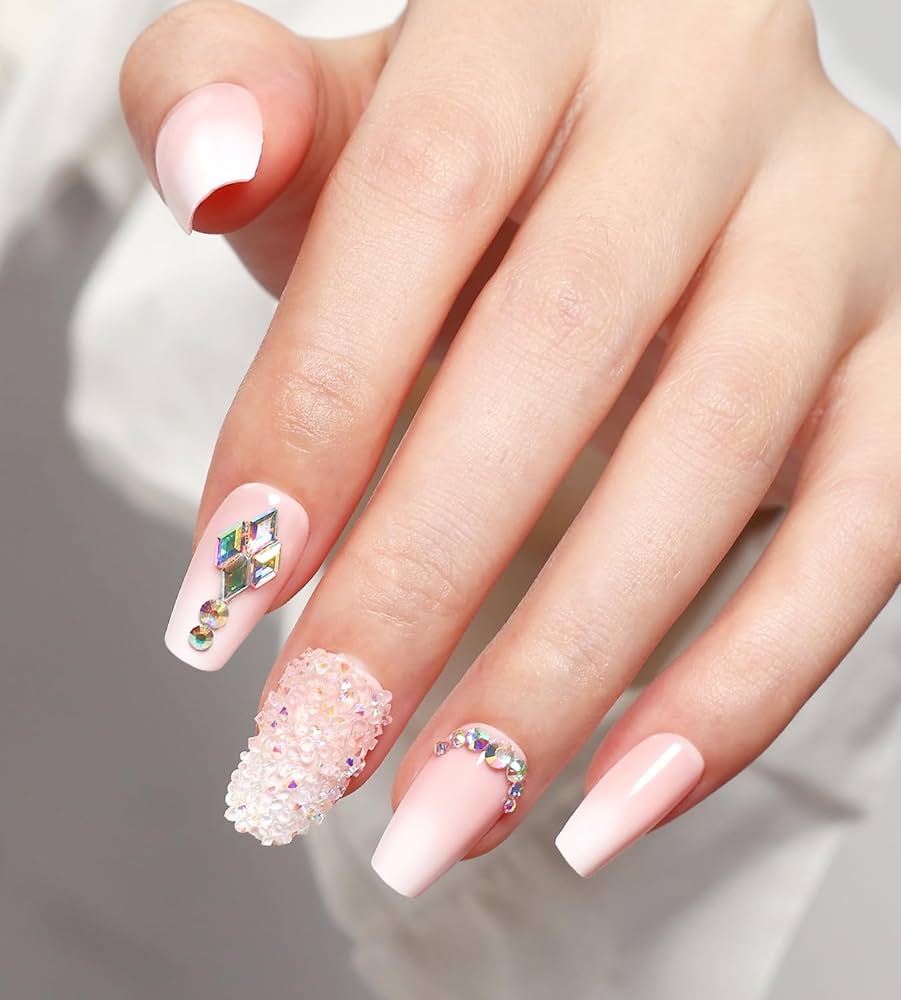
Inspirational Ideas For Rhinestone Projects
Unleash your creativity with stick-on rhinestones and transform regular objects into dazzling treasures. From sparkling phone cases to shimmering shoes, the possibilities are endless. Each idea is a chance to personalize and glamorize everyday items. Let’s explore some inspirational ideas for your next rhinestone project!
Transforming Everyday Items
Stick-on rhinestones offer a simple way to upgrade ordinary items into unique, eye-catching pieces. This crafty technique needs no pro skills. Here are some easy ways to start your bedazzling journey:
- Stationery: Brighten up pens, notebooks, and planners.
- Home Decor: Accentuate picture frames or vases.
- Accessories: Enhance purses, belts, or jewelry.
Seasonal And Thematic Designs
Align your rhinestone projects with the seasons or celebrate special events.
| Season/Event | Ideas |
|---|---|
| Spring | Floral patterns on sun hats or scarves. |
| Summer | Beach themes on tote bags or flip-flops. |
| Fall | Leaf motifs on tablecloths or napkin holders. |
| Winter | Snowflakes on sweaters or mittens. |
| Holidays | Hearts for Valentine’s Day; Stars for Fourth of July. |
Employ stick-on rhinestones to convey the spirit of the time. Not only do they add sparkle, but they also make the moment more memorable.

Credit: www.amazon.com
Frequently Asked Questions On How To Create A Design With Stick On Rhinestones
What Can I Use To Make A Rhinestone Template?
Use sticky flock material or heat-resistant transfer tape for creating a rhinestone template. Precise holes can be cut with a vinyl cutter to place rhinestones accurately.
Can Cricut Maker Cut Rhinestone Templates?
Yes, the Cricut Maker can cut rhinestone templates using its precise cutting feature for custom designs.
How Do You Transfer Rhinestones?
Transfer rhinestones by: 1. Peel off the protective film from the transfer paper. 2. Position rhinestones face down onto the sticky side. 3. Apply the transfer tape to your chosen surface. 4. Press firmly, ensuring adherence. 5. Gently peel back the transfer tape, leaving rhinestones in place.
How Do You Use Rhinestone Stickers?
Select a clean, dry surface for your rhinestone stickers. Remove the backing and carefully place the sticker. Press firmly to ensure strong adhesion. Avoid touching the adhesive side to keep its stickiness intact. Enjoy your sparkling embellishment!
Conclusion
Crafting with stick-on rhinestones is simple yet transformative. By following the steps outlined, anyone can elevate their designs from plain to fabulous. Remember, the key is creativity and placement precision. Sparkle on and let your creations shine!