

To make custom stickers at home, you will need the right sticker or label paper, a sticker-friendly printer with enough ink, laminating sheets for extra protection, and baggies if you want to create sticker packs. You can also make stickers without a machine by drawing your designs on contact paper using sharpies, cutting out the stickers around your designs, and then peeling off the paper backing and sticking them to the desired surface.
If you’re looking for an easy software to create stickers, Adobe Illustrator and Photoshop are highly recommended. Using a Cricut machine can also make sticker-making incredibly easy, as it does most of the cutting work for you.
Materials And Equipment Needed
To make custom stickers at home, you’ll need sticker or label paper, a printer with enough ink, laminating sheets for added protection, and baggies if you want to create sticker packs. You can easily design and print your own stickers with the right materials and equipment.
to the Cricut software, select the materials and settings, and let the machine do its magic. In no time, you’ll have a stack of professional-looking stickers ready to use or share with others.
But before you start creating your own custom stickers at home, it’s important to gather the necessary materials and equipment. Here’s a breakdown of what you’ll need:
Sticker Or Label Paper:
To ensure your stickers come out vibrant and stick well, it’s crucial to use the right type of paper. Sticker or label paper is specifically designed to hold ink and adhesive effectively, resulting in high-quality stickers. There are various options available in the market, such as Avery Ink Jet Sticker Project Paper or Cricut Printable Sticker Paper.
Sticker-friendly Printer With Enough Ink:
A good quality printer is essential to bring your designs to life. Look for a printer that is capable of printing on sticker or label paper, and make sure it has enough ink to complete your sticker projects. This will help ensure that your stickers have crisp, clear colors and sharp details.
Laminating Sheets (optional):
If you want to add extra protection to your stickers or make them waterproof, laminating sheets can be a great addition. These transparent sheets create a glossy finish and help prevent your stickers from fading or rubbing off over time.
Baggies (optional):
Creating sticker packs can be a fun way to share your designs or sell them as a product. Baggies or small resealable plastic bags can be used to hold and package your stickers, keeping them organized and protected.
By having these materials and equipment on hand, you’ll be well-equipped to embark on your sticker-making journey. Remember, the right materials and equipment can make a significant difference in the quality and durability of your custom stickers.
So, gather everything you need, let your creativity flow, and start making your own unique stickers at home.
Making Stickers With A Printer
To make custom stickers at home, one method is to use a printer. Simply print your designs onto sticker paper and cut them out for easy homemade stickers.
Types Of Stickers
When it comes to making custom stickers at home, there are various types to choose from. Whether you want vinyl stickers for outdoor use or glossy stickers for indoor applications, it’s important to select the right type based on your needs. Here are a few common types of stickers you can create:
- Vinyl Stickers: These are durable and weather-resistant, perfect for outdoor use on cars, laptops, and other surfaces exposed to the elements.
- Glossy Stickers: Ideal for indoor applications, glossy stickers have a shiny finish that enhances the colors and makes them stand out.
- Matte Stickers: If you prefer a more subdued look, matte stickers offer a non-reflective finish that gives your designs a sophisticated appearance.
Ordering Stickers From A Manufacturer
If you don’t have the necessary tools or time to make stickers at home, you can always order them from a professional manufacturer. Many companies offer custom sticker printing services, allowing you to upload your own designs and receive high-quality stickers delivered right to your doorstep. Some popular online sticker printing services include Sticker Mule, PrintRunner, and PsPrint.
Tools Needed
To create custom stickers at home using a printer, you’ll need a few essential tools. Make sure you have the following items before you begin:
- A Computer: You’ll need a computer with design software installed, such as Adobe Illustrator or Photoshop, to create your sticker designs.
- A Printer: Choose a printer that is compatible with sticker paper and can produce high-quality prints.
- Sticker Paper: This special type of paper has adhesive backing, allowing you to easily stick your designs to various surfaces.
- Scissors or a Craft Knife: These tools will help you cut out your printed designs precisely.
Adjusting Colors
Before you hit the print button, it’s essential to adjust the colors of your sticker designs to ensure accurate and vibrant results. Many design software programs offer color correction tools that allow you to enhance or tweak the colors as desired. Experiment with brightness, contrast, and saturation to achieve the desired look for your stickers.
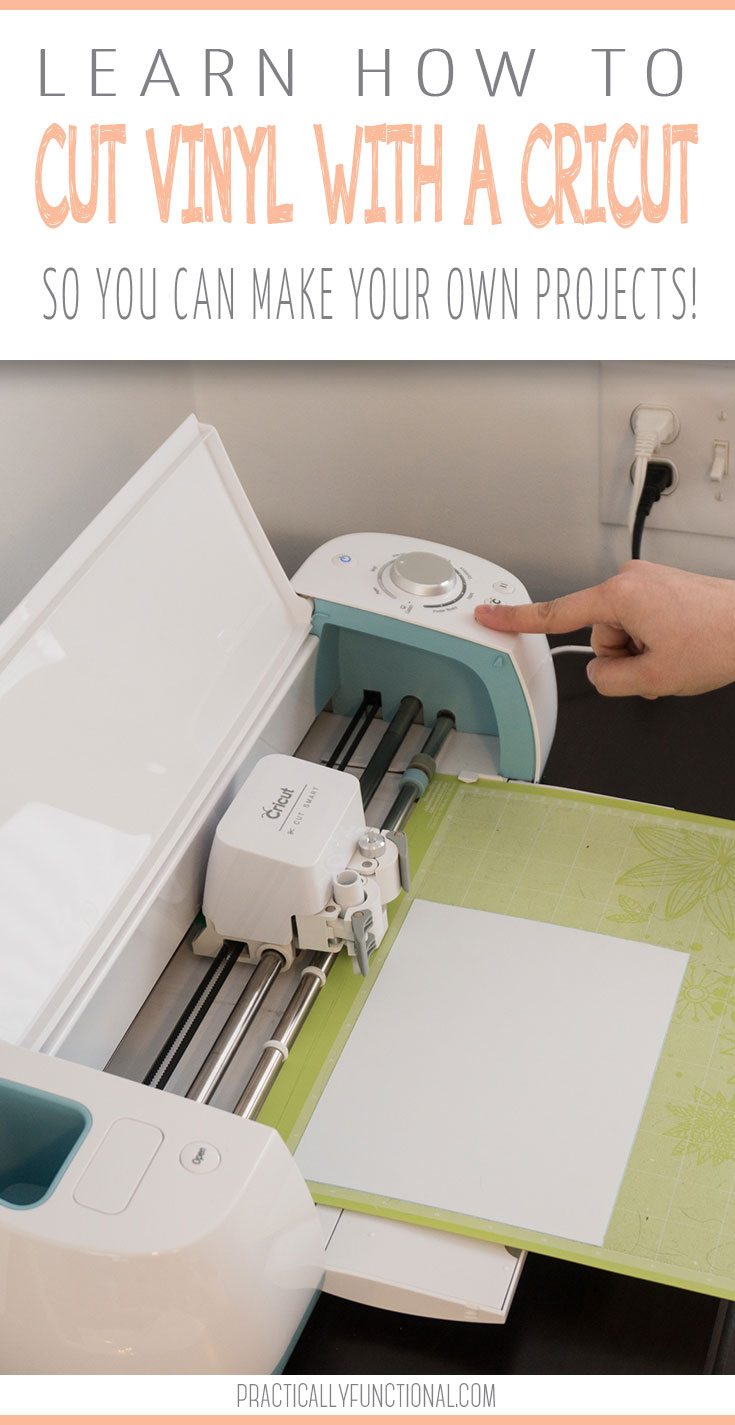
Using Cricut
If you own a Cricut cutting machine, you can take your sticker making to the next level. Cricut machines are designed to cut intricate designs accurately, making them perfect for creating detailed stickers. Simply upload your design to the Cricut software, load your sticker paper into the machine, and let it work its magic.
Using A Sticker Sheet
Sticker sheets are a convenient option when it comes to making multiple stickers at once. These sheets have multiple sticker designs on a single adhesive-backed page, allowing you to print and cut them out easily.
Once you have printed your sticker sheet, use scissors or a craft knife to separate each sticker and remove the backing before affixing them to your desired surfaces.
Tips For Printing Stickers
- Use high-quality sticker paper to achieve clear, vibrant prints.
- Calibrate your printer settings to match the sticker paper type for accurate colors and optimal printouts.
- Allow your printed stickers enough time to dry completely before handling or applying any additional treatments.
- If you want to protect your stickers from scratches and fading, consider applying a layer of clear adhesive vinyl or using laminating sheets.
- Experiment with different designs, colors, and sticker sizes to find the style that best suits your needs and preferences.
Making Stickers From Scratch
Learn how to make custom stickers at home with Method 2: Making Stickers from Scratch. This step-by-step guide will teach you how to create unique stickers without the need for a machine or special equipment.
Printing On Sticker Paper
Printing your custom stickers on sticker paper is a simple and effective way to create your own personalized designs. To get started, you will need the right sticker or label paper that is compatible with your printer. Some popular options include Avery Ink Jet Sticker Project Paper, ZICOTO Premium Printable Vinyl Sticker Paper, Silhouette Printable White Sticker Paper, and Cricut Printable Sticker Paper. Choose the one that suits your needs and printer type.
Processing Vector Files
If you have a design software like Adobe Illustrator, you can create your sticker designs using vector files. Vector files are great for creating high-quality, scalable artwork. Make sure to use the appropriate design file format, such as .ai or .eps, to ensure the best results.
Processing Image Files
If you prefer to use images for your sticker designs, you can process image files to create your stickers. Popular image file formats include .jpeg, .png, and .bmp. Ensure that your images have a high resolution and are suitable for printing.
Preparing Files For Printing
Before printing your stickers, it’s essential to prepare your files correctly. Ensure that the dimensions of your design match the size of your sticker paper. Adjust colors and contrast if needed to achieve the desired effect. Double-check spelling, alignment, and overall layout to avoid any mistakes or issues during printing.
Setting Up The Printer
To achieve optimal printing results, it’s crucial to set up your printer correctly. Ensure that you have enough ink in your printer cartridges to complete the printing job without interruptions. Adjust the printer settings to match the paper type and size you are using for your stickers.
Cutting The Stickers
Once your stickers are printed, it’s time to cut them out. Use a pair of sharp scissors or a craft knife to carefully cut along the edges of your designs. Take your time and follow the outlines precisely to ensure clean and professional-looking stickers.
Applying Laminate (optional)
If you want to add extra protection and durability to your stickers, applying a laminate can be a great option. Laminating sheets are available in various sizes and are easy to apply. Simply peel off the backing of the laminate sheet and carefully place it over your sticker. Use a roller or your fingers to smooth out any air bubbles and ensure a secure bond.
Creating Sticker Packs
To make your custom stickers even more exciting, you can create sticker packs. Place your finished stickers in small baggies and add a personalized label or decoration to make each pack unique. Sticker packs make great gifts or promotional items and allow you to showcase your creativity.
Alternative Methods: Making Stickers Without A Machine
Learn how to make custom stickers at home without the need for a machine. This alternative method allows you to create personalized stickers using simple materials like paper, clear tape, and markers. Get creative and start making your own unique stickers today.
is design your sticker and load it into the Cricut software. From there, you can simply select the right settings and let the machine work its magic. But what if you don’t have a cutting machine like Cricut? Don’t worry, there are alternative methods to make stickers at home without a machine.
In this article, we will explore three different methods: hand-drawing stickers, using adhesive contact paper, and creating stickers with clear tape.
Hand-drawing stickers
If you’re feeling creative and want to personalize your stickers, hand-drawing is a great option. Here’s how you can do it:
1. Start by sketching or drawing your design on a piece of plain paper. Make sure to keep your lines clean and precise.
2. Once you’re satisfied with your drawing, use a fine-tipped marker or pen to trace over the lines of your design.
3. Next, scan or take a high-quality photograph of your drawing and transfer it to your computer.
4. Open a graphic design software like Adobe Photoshop or Illustrator and import your scanned image.
5. Use the software tools to refine and clean up your design if necessary. You can adjust the colors, add text, or resize your design.
6. When you’re happy with the final design, print it onto sticker paper using your home printer.
7. Cut out your stickers using scissors or a craft knife, following the outline of your design. Voila! Your hand-drawn stickers are ready to be used.
Using Adhesive Contact Paper
Another method to create stickers without a machine is by using adhesive contact paper. Here’s how:
1. Start by selecting a design or image that you want to turn into a sticker.
2. Print out your chosen design onto regular paper at the size you want your sticker to be.
3. Cut a piece of adhesive contact paper slightly larger than your printed design.
4. Carefully peel off the backing of the contact paper and place it sticky side up on a clean, flat surface.
5. Align your printed design with the contact paper and press it onto the sticky side, smoothing out any air bubbles or wrinkles.
6. Use a pair of scissors or a craft knife to cut out your stickers, following the outline of your design.
7. Peel off the contact paper backing and your stickers are ready to use or decorate!
Creating Stickers With Clear Tape
If you don’t have any sticker paper or adhesive contact paper, you can still make stickers using clear tape. Here’s how:
1. Start by printing out your design on regular paper.
2. Place a piece of clear tape (packing tape or transparent tape works best) sticky side up on a clean, flat surface.
3. Carefully place your printed design on top of the tape, making sure it is aligned.
4. Press down firmly to secure the paper to the tape, smoothing out any air bubbles or wrinkles along the way.
5. Trim off any excess tape around the edges of your design using scissors or a craft knife.
6. Peel off the backing of the tape, and your stickers are ready to be used!
In conclusion, you don’t need a cutting machine to make custom stickers at home. With hand-drawing, adhesive contact paper, and clear tape, you can create unique and personalized stickers that suit your style. Give these alternative methods a try and unleash your creativity today!
Tips For Sticker Making Success
Learn the tips for sticker making success when creating custom stickers at home. Find out how to avoid overused phrases, keep sentences short, and maintain reader interest with varied expressions. Achieve SEO-friendly, human-like content that is easy to understand and plagiarism-free.
Choosing The Right Designs
When it comes to sticker making success, choosing the right designs is crucial. You want your stickers to stand out and capture attention. Here are some tips for selecting the perfect designs:
- Consider the purpose of your stickers. Are they for personal use, branding, or promotional materials?
- Think about your target audience and what designs might appeal to them.
- Ensure your designs are visually appealing and easily recognizable.
- Use high-quality images or create custom artwork to ensure clarity and crispness.
- Experiment with different colors, shapes, and sizes to find what works best for your stickers.
Adding Finishing Touches
After you’ve chosen your designs, it’s time to add those finishing touches that will elevate your stickers to the next level. Here are some tips to consider:
- Consider adding a glossy or matte finish to your stickers for added durability and a professional look.
- Experiment with different printing techniques, such as foiling or embossing, to create unique and eye-catching effects.
- If you’re printing your stickers at home, make sure your printer settings are optimized for sticker paper and adjust print quality as needed.
- For hand-drawn stickers, consider using markers or colored pencils to add vibrant colors and intricate details.
Troubleshooting Common Issues
No matter how experienced you are with sticker making, you may encounter some common issues along the way. Here are some troubleshooting tips to help you overcome these challenges:
| Issue | Troubleshooting Tip |
|---|---|
| Printing issues like streaks or smudges | Ensure your printer is properly calibrated and that you’re using high-quality sticker paper. |
| Stickers not sticking properly | Make sure the surface you’re applying the stickers to is clean and dry. You can also consider using adhesive sprays or double-sided tape for better adhesion. |
| Difficulty cutting stickers neatly | Invest in a sharp cutting tool or consider using a cutting machine like Cricut for precise and clean cuts. |
Remember, troubleshooting is part of the process, so don’t get discouraged if you encounter some challenges along the way. With patience and practice, you’ll be able to create beautiful stickers.
Storing And Organizing Stickers
Once you’ve made your custom stickers, it’s essential to have a system in place for storing and organizing them. Here are some tips to keep your stickers organized:
- Use storage containers or folders specifically designed for stickers to prevent them from getting damaged or misplaced.
- Label your storage containers or folders to easily identify different designs or themes.
- If you have a large sticker collection, consider creating a catalog or inventory list to keep track of what you have.
- Store your stickers in a cool, dry place away from direct sunlight to preserve their quality and colors.
Exploring Creative Possibilities
Finally, don’t be afraid to explore the creative possibilities that sticker making offers. Here are some ideas to spark your creativity:
- Create sticker packs with different themes or designs to cater to different audiences or occasions.
- Experiment with different sticker materials like vinyl or holographic paper for unique textures and effects.
- Consider collaborating with other artists or designers to create limited edition sticker collections.
- Explore different applications for your stickers, such as decorating laptops, water bottles, or gift packaging.
With these tips for sticker making success, you’ll be well-equipped to create custom stickers that are not only visually appealing but also reflect your unique style and creativity. Start exploring your sticker making journey today and let your imagination run wild!
Credit: www.practicallyfunctional.com
Frequently Asked Questions On How To Make Custom Stickers At Home
What Do I Need To Make Custom Stickers At Home?
To make custom stickers at home, you’ll need the following: sticker or label paper, a printer with enough ink, laminating sheets for extra protection, and baggies if you want to create sticker packs.
How Do You Make Stickers Without A Machine?
To make stickers without a machine, you can use sticker paper and print your own designs using a sticker-friendly printer. Alternatively, you can draw your designs on the shiny side of contact paper using sharpies, cut them out, and stick them to any surface you want.
What Is The Easiest Software To Make Stickers?
Adobe Illustrator and Photoshop are the easiest software tools to make stickers. They are ideal for graphic design projects, including designing stickers. These programs offer a wide range of features and flexibility to create custom and professional-looking stickers.
Can You Make Your Own Stickers With Cricut?
Yes, you can make your own stickers with Cricut. Upload your design to the Cricut software, load up your vinyl, and let the machine cut out your designs with precision. It’s easy and convenient.
Conclusion
Making custom stickers at home is an easy and rewarding process. With the right materials and tools, such as sticker or label paper and a printer, you can create personalized stickers for any purpose. Whether you choose to design them from scratch or use pre-made templates, the possibilities are endless.
Not only is it a fun DIY project, but it also allows you to showcase your creativity and add a personal touch to your belongings. So why wait? Start making your own custom stickers today and let your imagination run wild!