
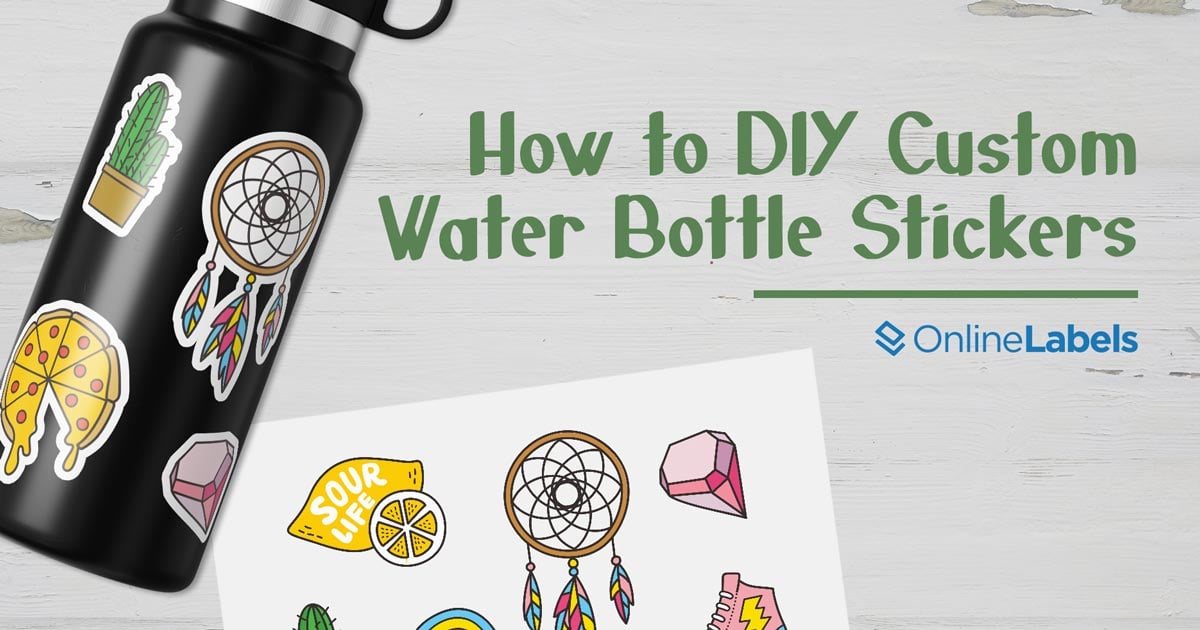
Want to know how to make custom stickers? Design your stickers using a drawing tool and print them out. Then, run them through a cutting tool for the final touch.
Gathering Materials And Designing Your Sticker
When it comes to making custom stickers, the first step is to gather all the necessary materials and design your sticker. This involves researching and gathering necessary supplies, choosing the right design program or drawing tool, and creating your custom sticker design. Let’s take a look at each of these steps in detail.
Researching And Gathering Necessary Supplies
To make custom stickers, you will need a few essential supplies. Here are some of the supplies you should gather:
- Sticker paper
- Printer
- Design program or drawing tool
- Cutting tool (such as a cutting machine or scissors)
- Optional: Laminate film or clear sealant for added protection
These supplies can be easily found online or at your local craft stores. Make sure to research and choose the best quality materials that suit your needs and budget.
Choosing The Right Design Program Or Drawing Tool
Once you have gathered all the necessary supplies, the next step is to select the right design program or drawing tool for creating your custom sticker design. Here are a few options to consider:
- Adobe Illustrator: A powerful design program used by professionals.
- Procreate: A popular drawing tool for iPad users.
- Sticker Maker Studio app: An app specifically designed for creating stickers on your mobile device.
Choose a program or tool that you are comfortable with and that offers the features you need to bring your sticker design to life.
Creating Your Custom Sticker Design
Now that you have all your supplies and have selected the design program or drawing tool, it’s time to create your custom sticker design. Here are the steps to follow:
- Draw: Use your chosen drawing tool or design program to create the graphics or text for your sticker design. Let your creativity flow and make sure your design accurately represents the message or image you want to convey.
- Print: Once you are satisfied with your sticker design, it’s time to print it out. Make sure to use the appropriate settings and select the right sticker paper that is compatible with your printer.
- Cut: After printing your sticker design, carefully cut it out using a cutting tool. This can be a cutting machine, scissors, or any other tool that allows you to achieve clean and precise cuts.
Remember to take your time and be patient throughout the design and cutting process to ensure the best results for your custom sticker.
Now that you have finished designing and cutting your custom sticker, you are one step closer to having your own personalized stickers. The next step is to package and use your stickers, but that will be covered in a separate section of this blog post.
Printing And Preparing Your Stickers
Learn how to make custom stickers with these easy-to-follow steps: draw your design, print it out, and cut it with a cutting tool. Create personalized stickers from the comfort of your own home.
Selecting The Appropriate Paper For Printing
When it comes to printing custom stickers, selecting the right paper is crucial. The type of paper you choose can greatly impact the durability and overall quality of your stickers. For vibrant and long-lasting stickers, it is recommended to use glossy or matte sticker paper. Glossy paper creates a shiny finish and enhances the colors of your design, while matte paper offers a more subdued and professional look. It is important to ensure that the paper you choose is compatible with your printer to avoid any printing issues.
Adjusting The Width And Size Of Your Sticker Design
To create custom stickers that perfectly fit your vision, it is essential to adjust their width and size. Before printing, make sure to accurately measure the dimensions of your stickers and adjust the design accordingly. This can be easily done using design software or online editing tools. By properly adjusting the width and size, you ensure that your stickers will fit within the desired space and appear balanced. Don’t forget to maintain the aspect ratio of your design to prevent distortion when resizing.
Adding Color Fill And Finalizing Your Design
To make your custom stickers visually appealing and eye-catching, consider adding color fill to your design. Whether you choose to use vibrant colors or a more subtle palette, adding color fill enhances the overall look and feel of your stickers. Ensure that the colors you choose align with your brand or the purpose of your stickers. Once you have applied the color fill, take the time to finalize your design by adjusting any small details or adding finishing touches. A visually appealing design is more likely to capture attention and leave a lasting impression.
Test Printing And Ensuring Quality
Before printing a large batch of stickers, it is crucial to perform a test print to ensure the quality of your design. This step allows you to evaluate the resolution, colors, and overall appearance of your stickers. Be sure to check for any smudges, blurriness, or color inconsistencies. Adjust the printer settings if needed and retest until you are satisfied with the results. By conducting a test print, you can catch any potential issues and make necessary adjustments before committing to a larger print run. This ensures that your final printed stickers will meet your expectations and maintain a high level of quality.
Cutting And Packaging Your Stickers
Once you’ve designed and printed your custom stickers, the next step is to cut them and package them for presentation. This is where attention to detail is crucial, as it can greatly impact the overall quality and appeal of your stickers.
In this section, we will discuss the different cutting methods you can choose from, the use of the Cricut machine or alternative cutting methods, the importance of laminating your stickers for durability, and finally, how to package and present your finished stickers.
Choosing The Cutting Method That Suits Your Needs
When it comes to cutting your custom stickers, it’s important to choose a method that aligns with your specific requirements. Here are a few options:
- 1. Scissors
- An inexpensive option, scissors can be used for cutting out simple and basic shapes. However, this method may not be the most precise or efficient for intricate designs.
- 2. Craft Knife
- A craft knife, such as an X-acto knife, provides more precision compared to scissors, and is ideal for cutting out intricate and detailed designs. However, it requires a steady hand and a certain level of skill.
- 3. Paper Cutter
- If you have a large volume of stickers to cut, a paper cutter can save you time and effort. This tool provides clean and straight cuts, making it ideal for mass production.
- 4. Cutting Machine
- A cutting machine like the Cricut machine offers precise and efficient cutting for both simple and complex designs. It allows you to create custom shapes and patterns, giving your stickers a professional look.
Consider your budget, the complexity of your design, and the volume of stickers you need to cut when choosing the cutting method that suits your needs.
Utilizing A Cricut Machine Or Alternative Cutting Methods
If you’re looking for a cutting method that provides precise and consistent results, the Cricut machine is a popular choice among crafters and sticker makers. This cutting machine allows you to upload your design and automatically cuts it out on various materials, including sticker paper. The Cricut machine offers versatility and ease of use, making it a top choice for many.
However, if you don’t have access to a Cricut machine, there are alternative cutting methods you can explore. As mentioned earlier, using a craft knife or a paper cutter can be effective for smaller quantities or simpler designs. Additionally, some local print shops or online services may offer professional cutting options if you prefer to outsource this task.
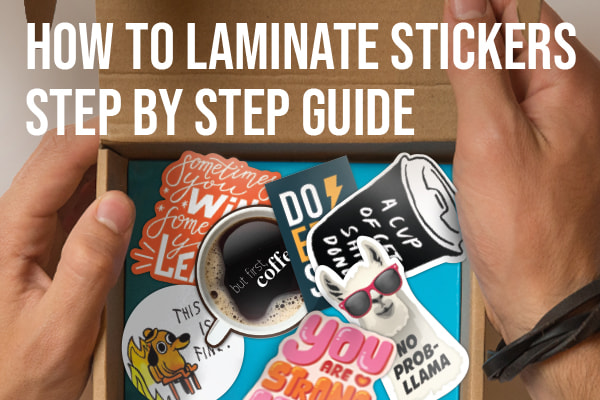
Laminating Your Stickers For Durability
Laminating your stickers is an essential step in ensuring their longevity and durability. This protective layer helps prevent fading, scratching, and water damage, making your stickers resistant to wear and tear. To laminate your stickers, you can use either a laminating machine or laminating sheets that can be adhered to the front and back of each sticker. This extra layer of protection will give your stickers a professional finish and ensure they remain in pristine condition for longer.
Packaging And Presenting Your Finished Stickers
Once your stickers are cut and laminated, it’s time to package and present them in an appealing and professional manner. The packaging plays a crucial role in attracting potential customers and making a lasting impression. Here are a few tips to consider:
- Choose appropriate packaging material like clear plastic bags or custom printed packaging that showcases your brand and protects the stickers.
- Consider adding additional branding elements, such as stickers with your logo or business card, to enhance the overall presentation and leave a lasting impression.
- Ensure each sticker is neatly placed in the packaging to avoid any damage or creases during transit.
- Include a thank you note or a small token of appreciation to show your gratitude to customers who purchase your stickers.
Paying attention to these details will not only enhance the overall presentation of your stickers but also help elevate the perceived value of your brand and products.
Credit: www.stickeryou.com
Alternative Methods For Making Stickers
When it comes to making custom stickers, there are several alternative methods that you can explore. Whether you want to create custom logo stickers, use sticker maker apps and software, or explore waterproof vinyl sticker options, there is a method that suits your needs. In this article, we will explore each of these alternative methods in detail.
Using Sticker Maker Apps And Software
If you’re looking for a quick and easy way to make custom stickers, a sticker maker app or software can be a great option. These tools allow you to design and create your own stickers using pre-designed templates or by importing your own artwork.
- Sticker Maker Studio
- Create personalized stickers for WhatsApp
- Sticker.ly – Sticker Maker
- Create custom stickers for messaging apps
- Stickify – Sticker Maker for WhatsApp
- Create and share stickers for WhatsApp
- Sticker Maker – Sticker Maker studio
- Create your own custom stickers
- Xyron Create-A-Sticker Mini Machine
- Turn your designs into stickers quickly and easily
These sticker maker apps and software provide a user-friendly interface and a wide range of features to help you create unique and personalized stickers. They are suitable for both beginners and professional designers.
Creating Custom Logo Stickers
If you want to promote your brand or showcase your logo, creating custom logo stickers is a great way to do it. With the help of design software or online platforms, you can easily design and print custom logo stickers.
Some popular options for creating custom logo stickers include:
- Custom Stickers – LAUKIYE Custom Stickers
- Custom Vinyl Stickers – Vinyl Graphics
- Custom Design Your Own Waterproof Vinyl Stickers
These options allow you to upload your logo or design, customize the shape, size, and finish, and then receive high-quality logo stickers that are suitable for both indoor and outdoor use.
Exploring Waterproof Vinyl Sticker Options
If you want your stickers to be durable and withstand various weather conditions, exploring waterproof vinyl sticker options is a must. Waterproof vinyl stickers are resistant to water, sunlight, and fading, making them perfect for outdoor use.
Some popular options for waterproof vinyl stickers include:
| Custom Waterproof Vinyl Stickers |
|---|
| Custom Waterproof Vinyl Stickers – Custom Stickers |
| Custom Waterproof Vinyl Stickers – Custom Waterproof Vinyl Stickers |
These waterproof vinyl sticker options provide a wide range of customization choices, allowing you to select the size, shape, and design that best fits your requirements.
Overall, when it comes to making custom stickers, be it using sticker maker apps and software, creating custom logo stickers, or exploring waterproof vinyl sticker options, there are plenty of alternatives to choose from. Each method offers its own set of advantages and can help you create unique and personalized stickers to suit your needs.
Frequently Asked Questions For How To Make Custom Stickers
How Can I Make My Own Stickers?
To make your own stickers, follow these steps: 1. Use a design program to draw your graphics or text. 2. Print out your sticker(s) once you’re satisfied with the design. 3. Run your printed sticker(s) through a cutting tool. 4. For iPhone users, you can turn a photo into a sticker by opening the Photos app and following the on-screen instructions.
5. Alternatively, you can try sticker maker apps like YouCam Perfect, Sticker Maker Studio, Sticker. ly, Wemoji, Funny Stickers, or LINE Sticker Maker.
What Is The Best Website For Sticker Making?
If you’re looking for a website for sticker making, StickerGiant, StickerMule, or StickerYou offer a wide variety of templates. For custom designs, any of these companies would be a good option.
How Do I Make A Sticker On Iphone?
To make a sticker on your iPhone, simply follow these steps: 1. Open the Photos app and select the photo you want to turn into a sticker. 2. Touch and hold the subject in the photo. 3. Tap “Add Sticker” when it appears.
4. The sticker will now be accessible in your stickers menu, which you can use with the onscreen keyboard or Markup tools. 5. To close the stickers menu, tap the “X” symbol. That’s it! You’ve successfully created a sticker on your iPhone.
How Do I Make Stickers From Photos?
To make stickers from photos, follow these steps: 1. Draw or design your graphics on a design program. 2. Print your stickers using a color printer on sticker paper. 3. Cut out your printed stickers using a cutting tool. 4. For iPhone users, you can turn a photo into a sticker using the Photos app.
5. You can also use sticker maker apps like YouCam Perfect, Sticker Maker Studio, Sticker. ly, Wemoji, Funny Stickers, and LINE Sticker Maker.
Conclusion
Creating custom stickers is a fun and creative way to personalize your belongings. By following a few simple steps, you can design, print, and cut your own stickers from the comfort of your own home. Whether you’re showcasing your artwork, promoting your business, or making personalized gifts, making custom stickers is a rewarding process.
With a variety of tools and techniques available, you can let your imagination run wild and bring your unique ideas to life. So, what are you waiting for? Start creating your own custom stickers today and add a touch of individuality to your world.